Lightning Experience Setup
Example — Displaying a Barcode Using the Email Field in Lead
This example demonstrates how to display a barcode using the Email field from Lead records.
The same approach can be applied to any other field on any standard or custom object in Salesforce.
Steps
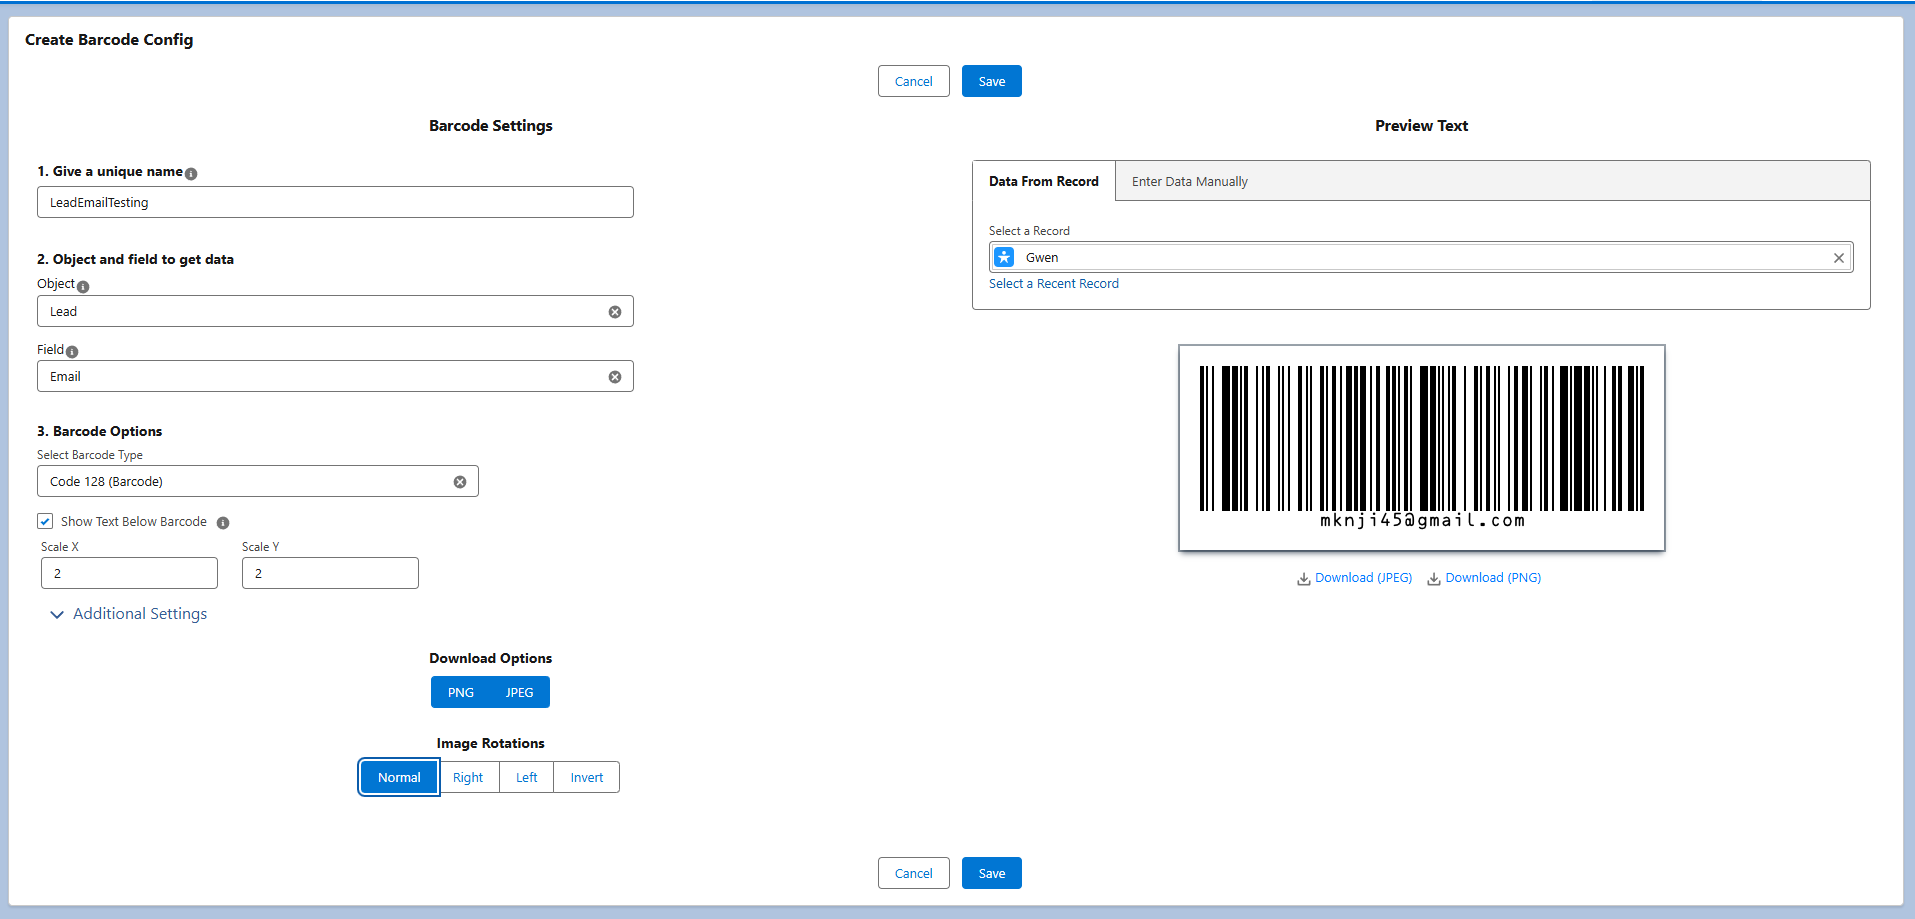
1️⃣ Create a Barcode Config Record for the Lead Email Field
- Go to the Create Barcode Config tab available in the app.
- Click New to create a new configuration record.
- Enter a Unique Config Name present in the left hand side.
- Use a name without spaces or special characters.
- Set the following values:
- Object Name:
Lead - Field Name:
Email
- Object Name:
- Barcode Type: Select the desired barcode type (e.g.,
Code128,QR Code, etc.). - Leave other fields as default (unless customization is required).
- Expand the additional settings if needed and configure them.
- You can modify options like Download options, Image Rotations etc.
- On right hand side you can select the data from record or you can enter data manually.
- Click Save button present on bottom.
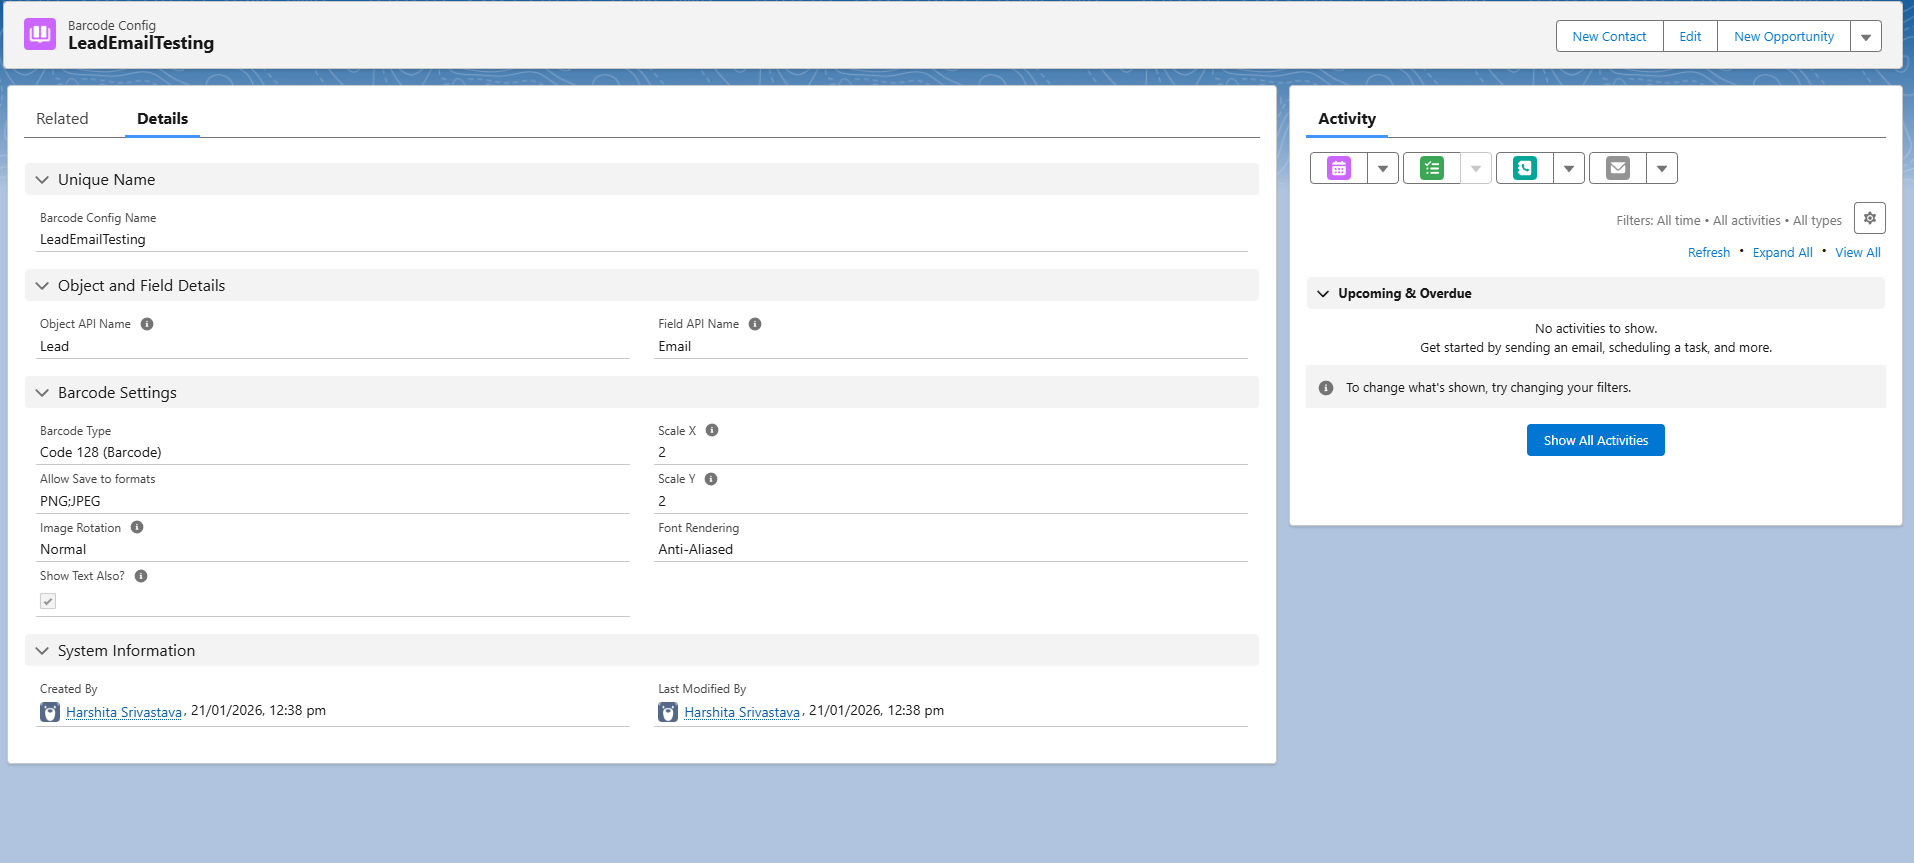
- Go to the Barcode Config App to check the record page of to verify the details.
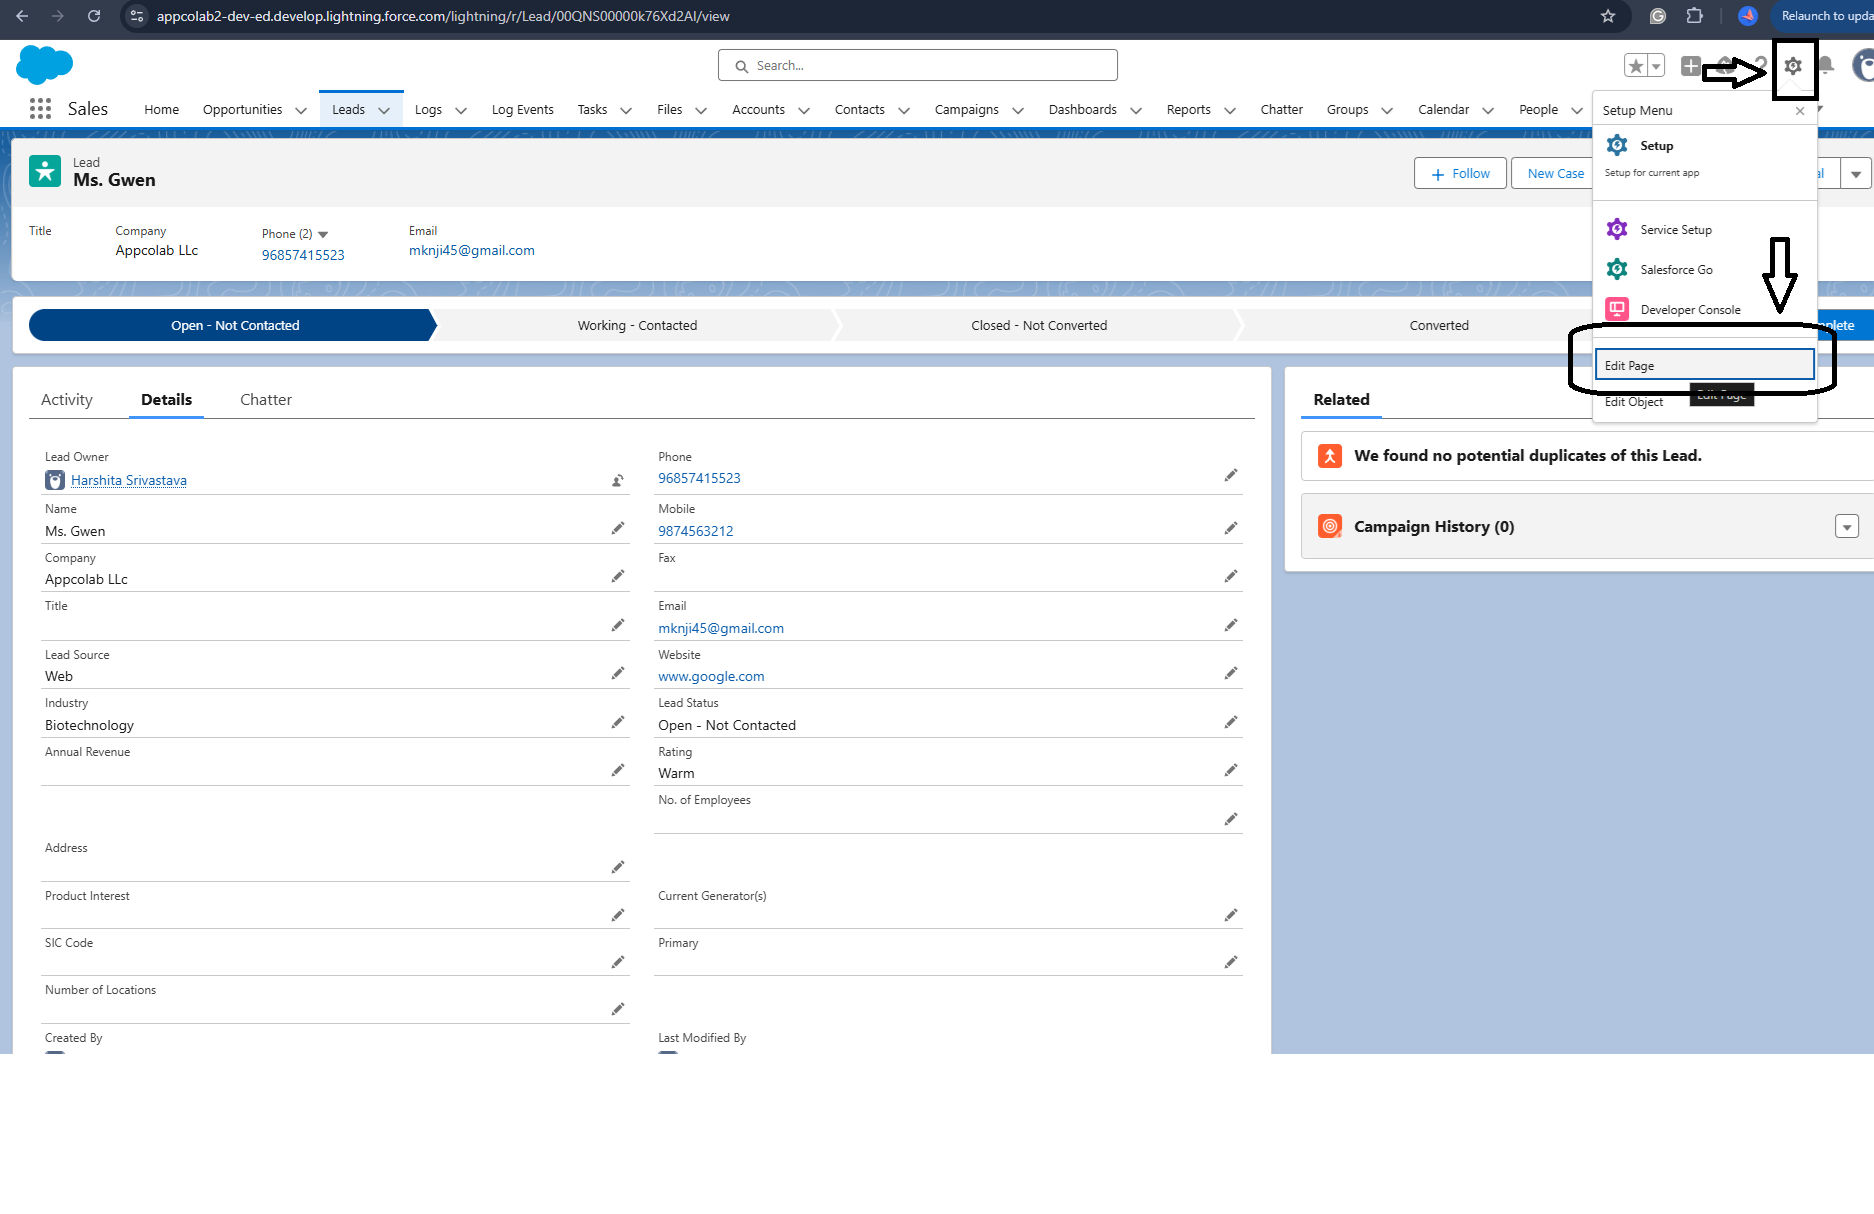
2️⃣ Add the Barcode Component to the Lead Record Page
- Open any Lead record details page. Make sure you select the object you typed in the configuration record.
- Click the Gear Icon (⚙️) present on the top and select Edit Page.
 3. Lightning App Builder page will appear onto your screen , scroll down a bit , you can see the component in Custom-Managed Section.
- From the left sidebar , drag the “Barcode and QR Code Generator” component onto the page layout.
- In the component properties, enter the value for Config Name
- Use the same name which you have entered in the record.
- Enter the Barcode Config Name in the right side panel. Enter the exact name you used while creating the Barcode Config record.
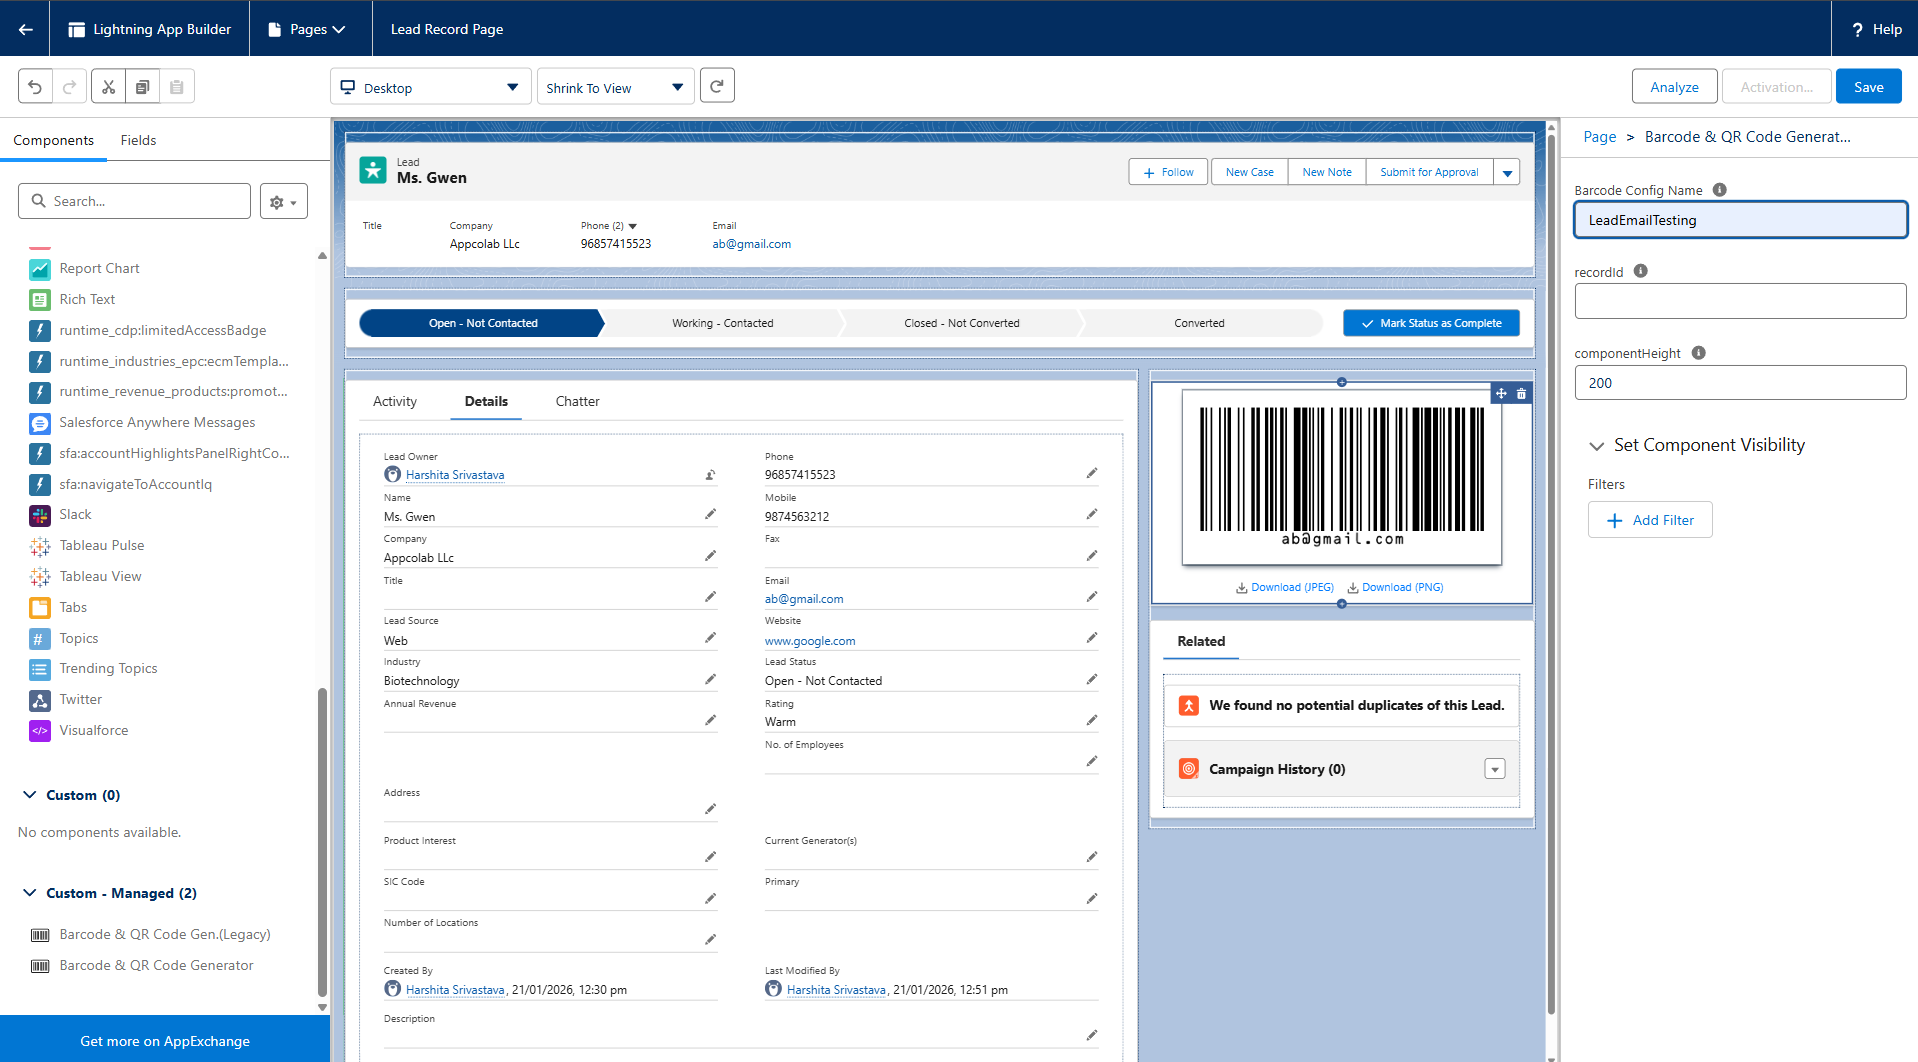
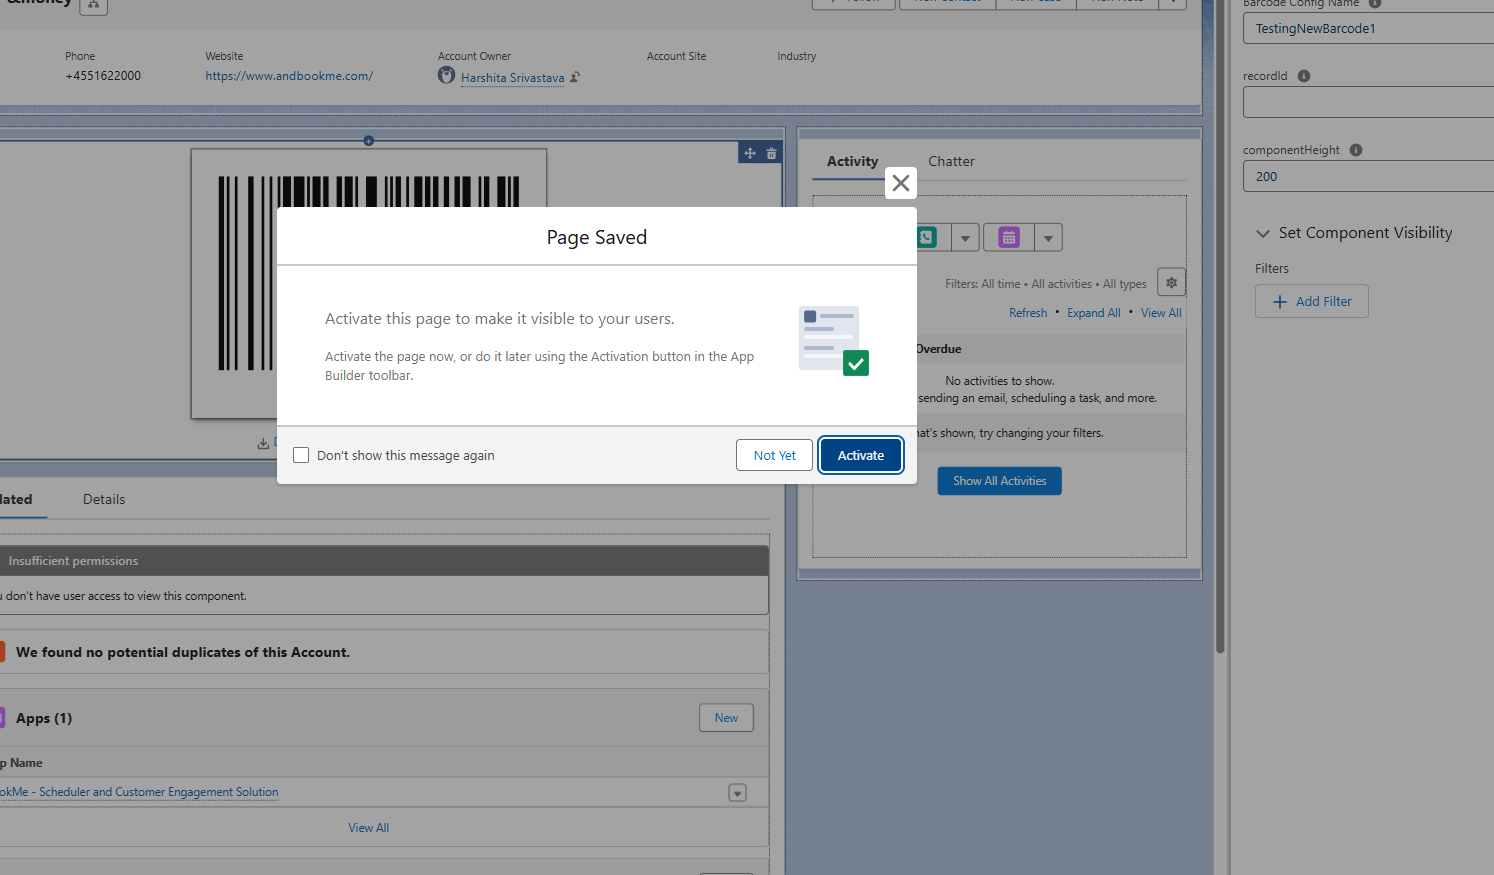
- Click Save (top-right corner)
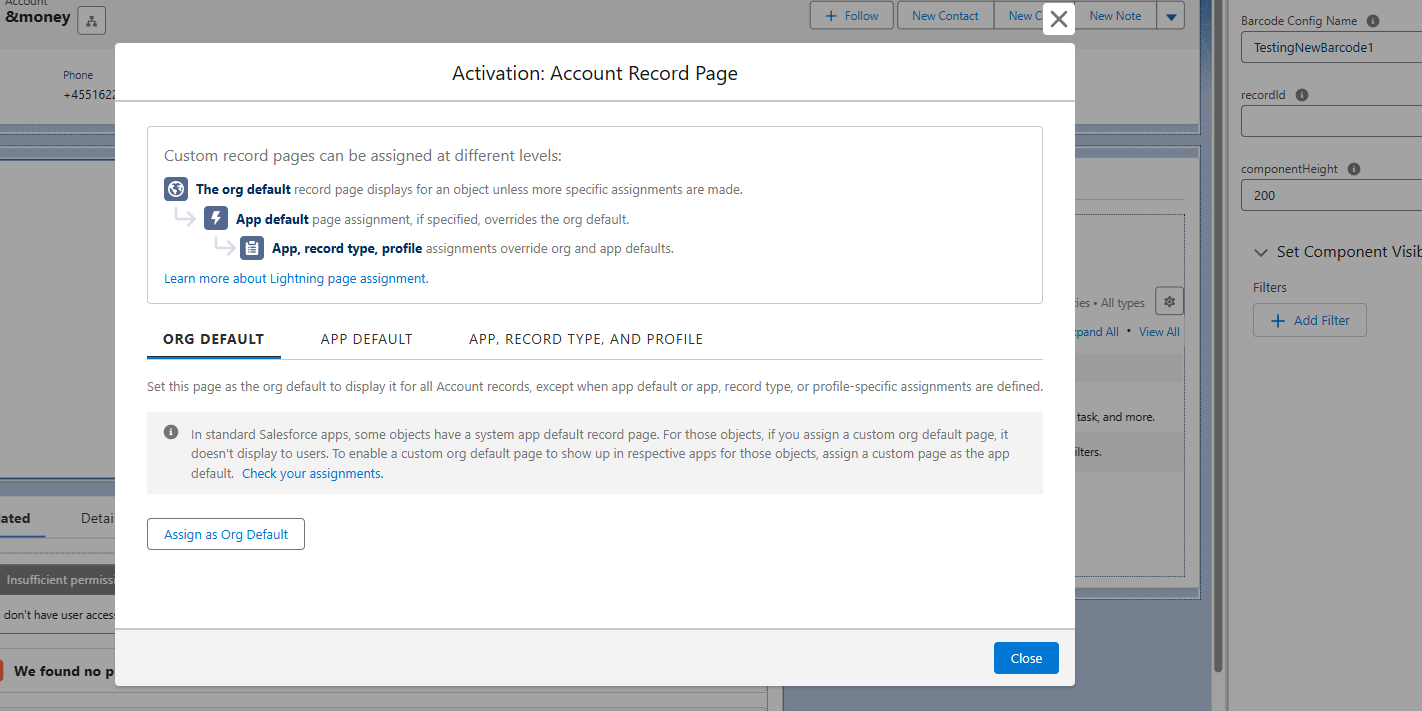
- Click Activate button and assign the page as:
 .
.
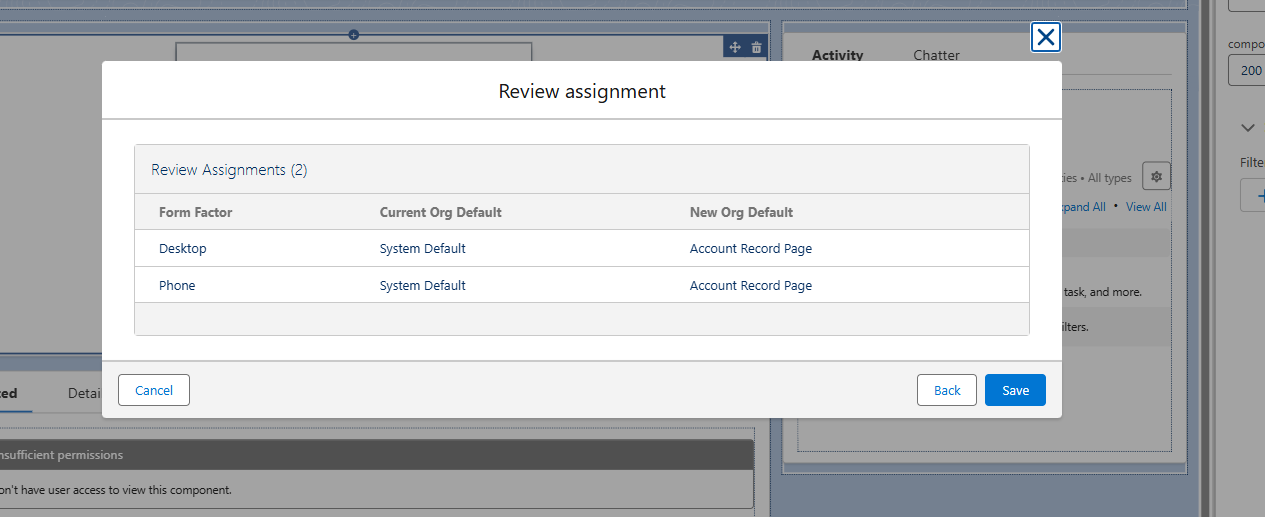
- Inside Org Default tab click on Assign as Org Default button.
 .
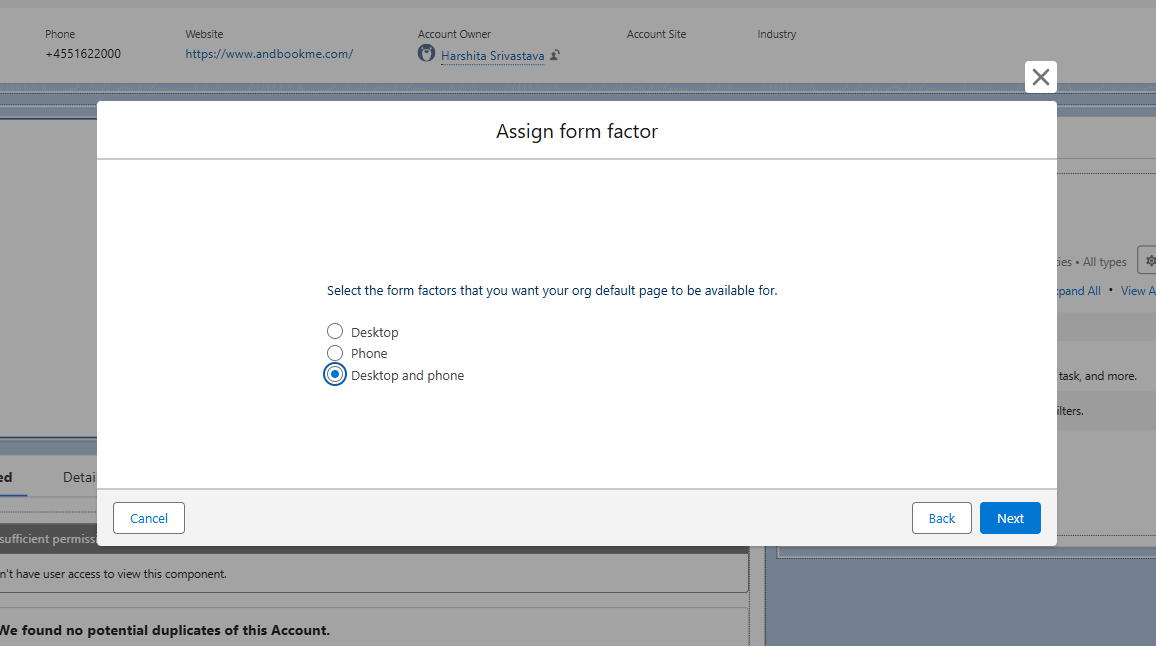
. - A popup will appear, click on Assign Form Factor button.
- Select the Desktop and Phone option and click Next.
- Inside Org Default tab click on Assign as Org Default button.
- Finally, click on Save button.
- You can now navigate back to the Account record page and see the barcode.
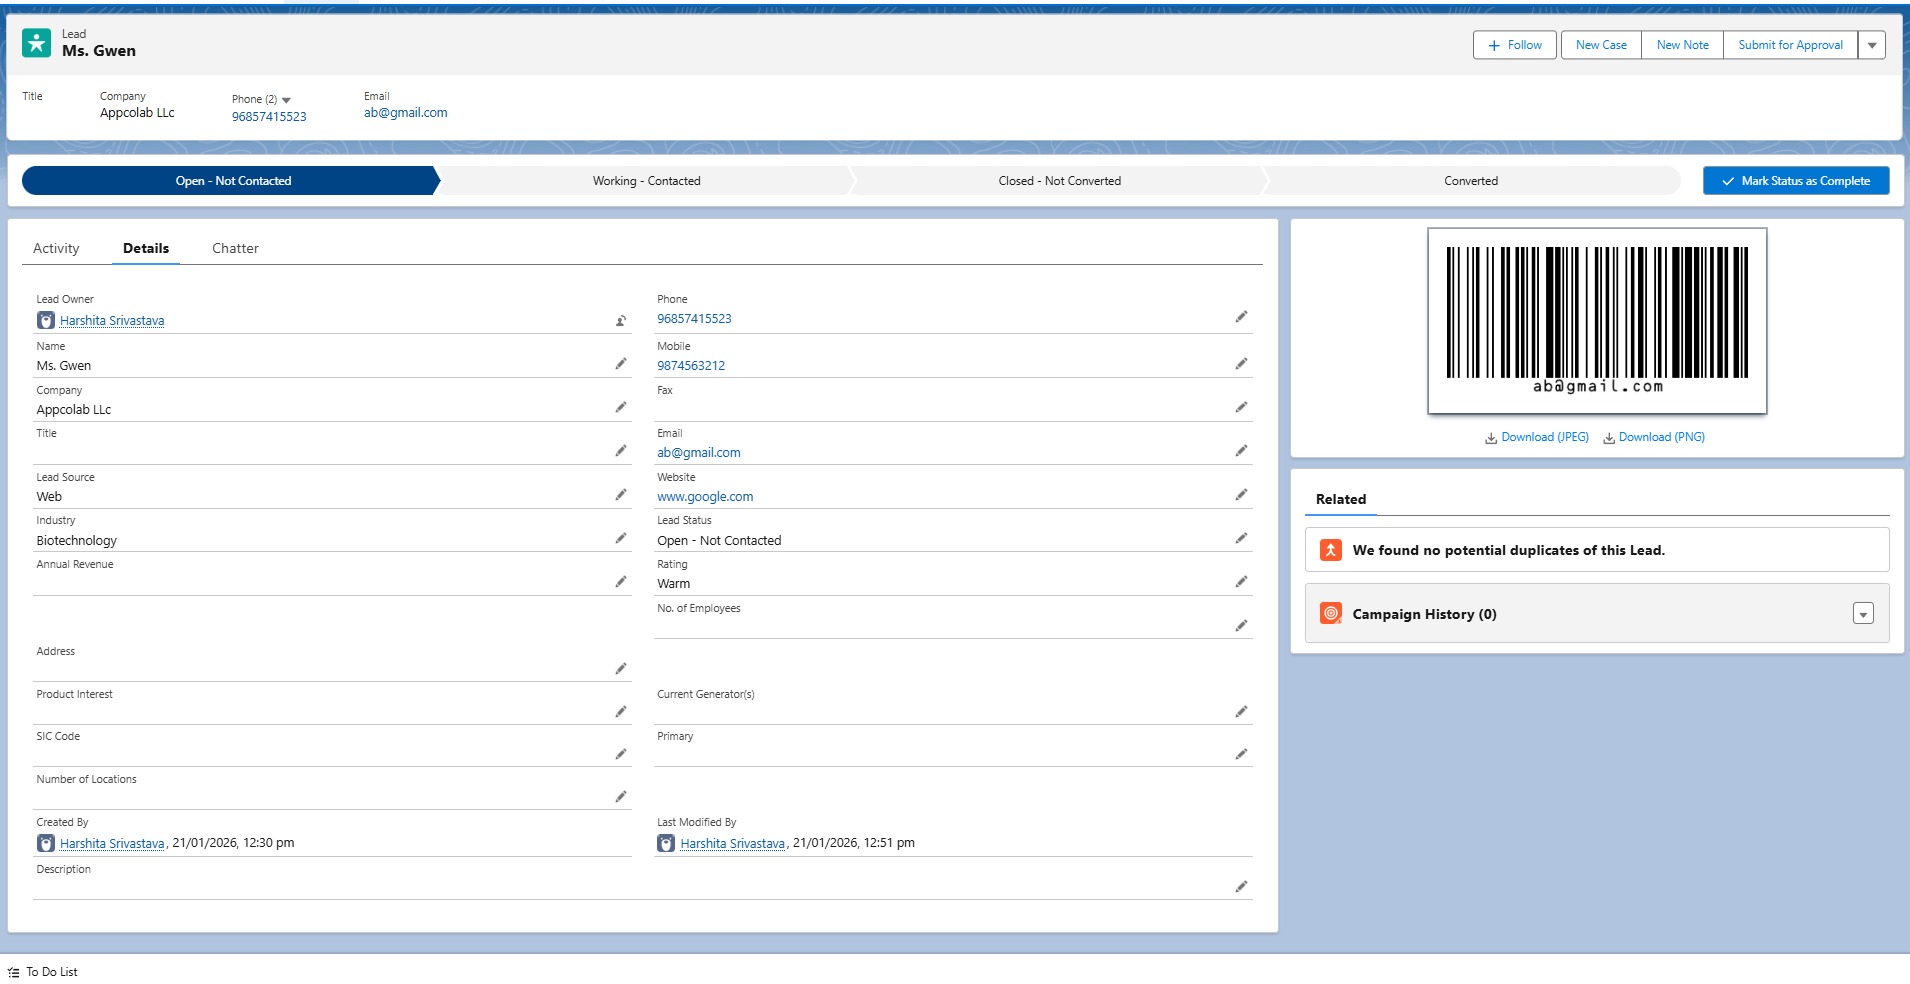
Result
If the configuration is set correctly, a barcode will be displayed when you open any account record.
Note
You can repeat the same steps to:
- Use a different field (e.g., Phone, Name, Custom Fields), or
- Apply barcode generation to other objects such as Lead, Contact, or Custom Objects.