Installation Guide
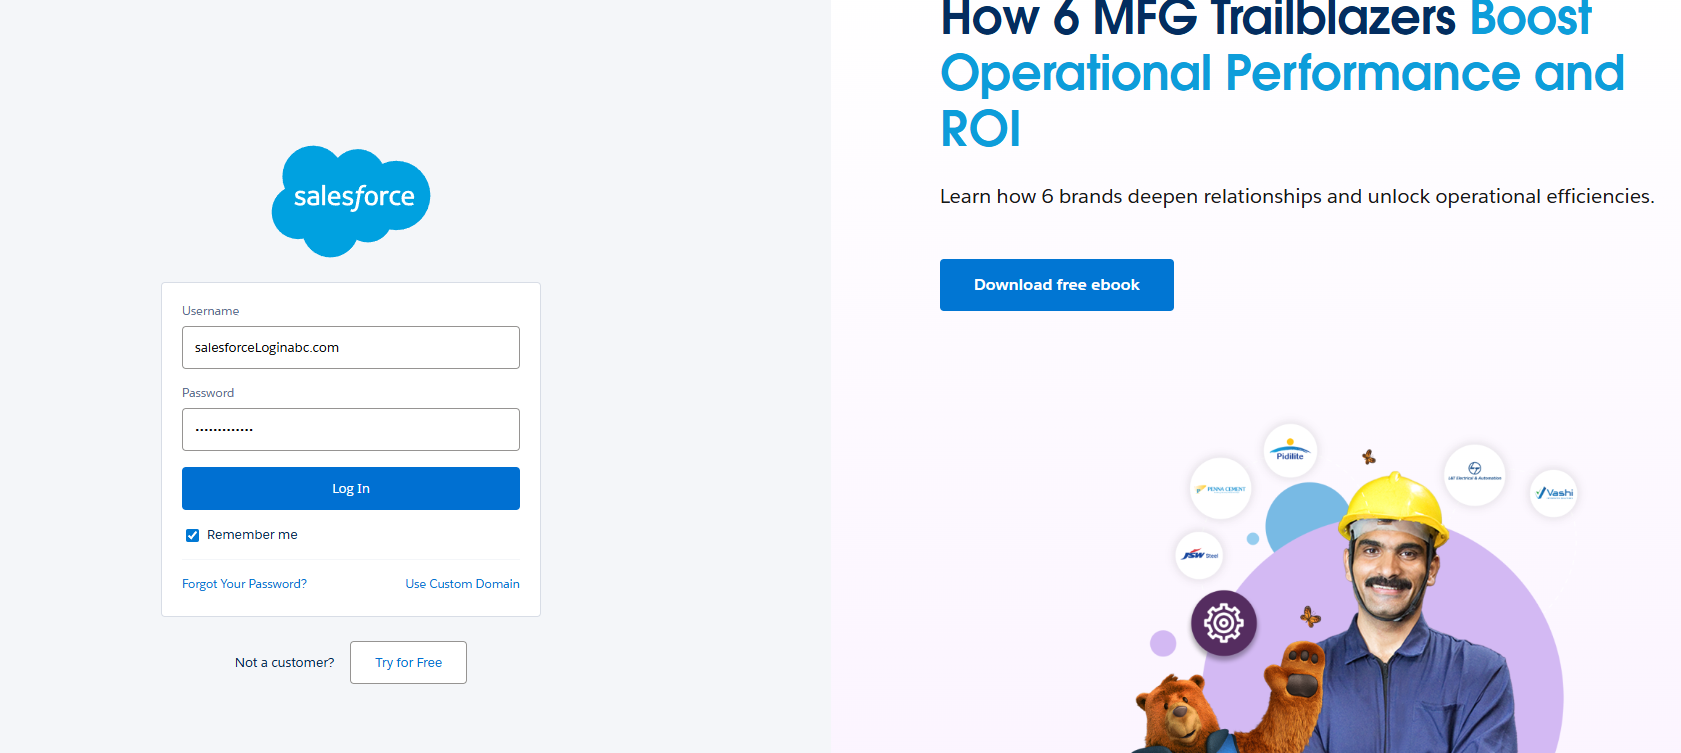
If you already have a Salesforce Org, do not click “Start Free Trial.” That will create a brand new, empty environment. Instead, log in with your existing credentials.
Installation
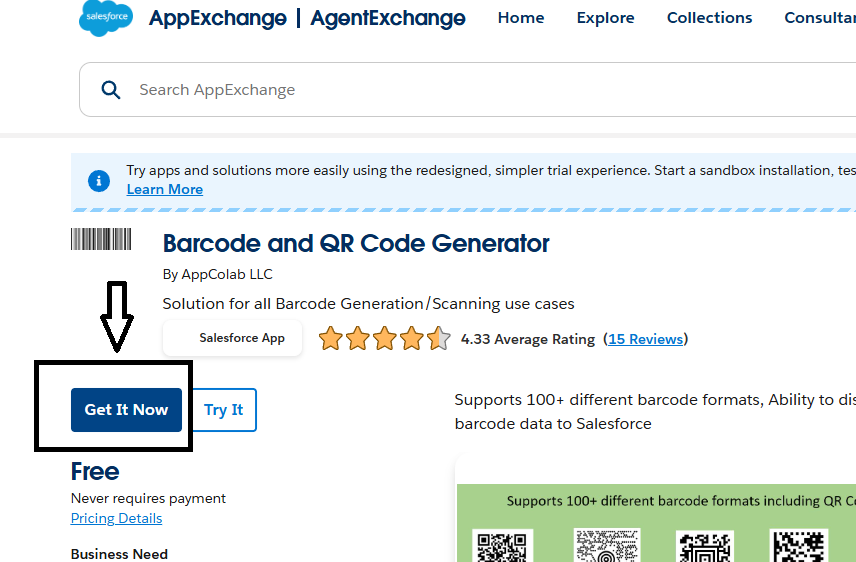
To install the app, click the link below to visit the Salesforce AppExchange and click Get It Now.
Visit Salesforce AppExchange Listing
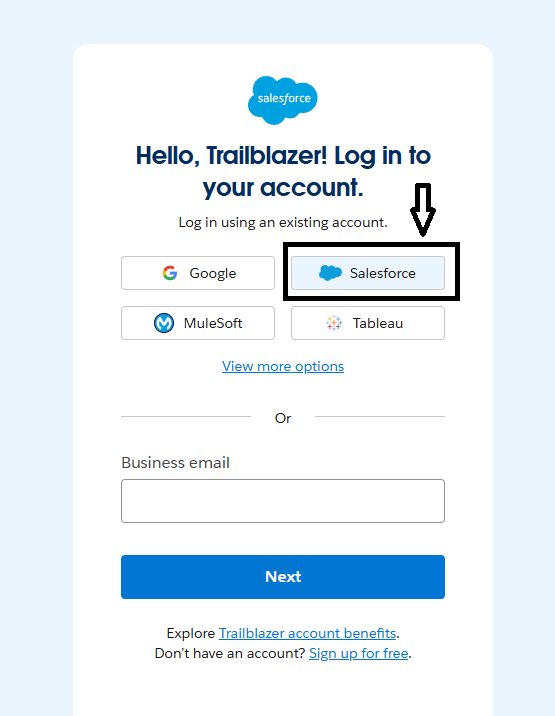
Step 2: Log In to your Salesforce/Trailblazer account
-
You will be asked to login to your trailblazer account, shown below:

-
Login using Salesforce or another login provider. Showing Salesforce example below.
-
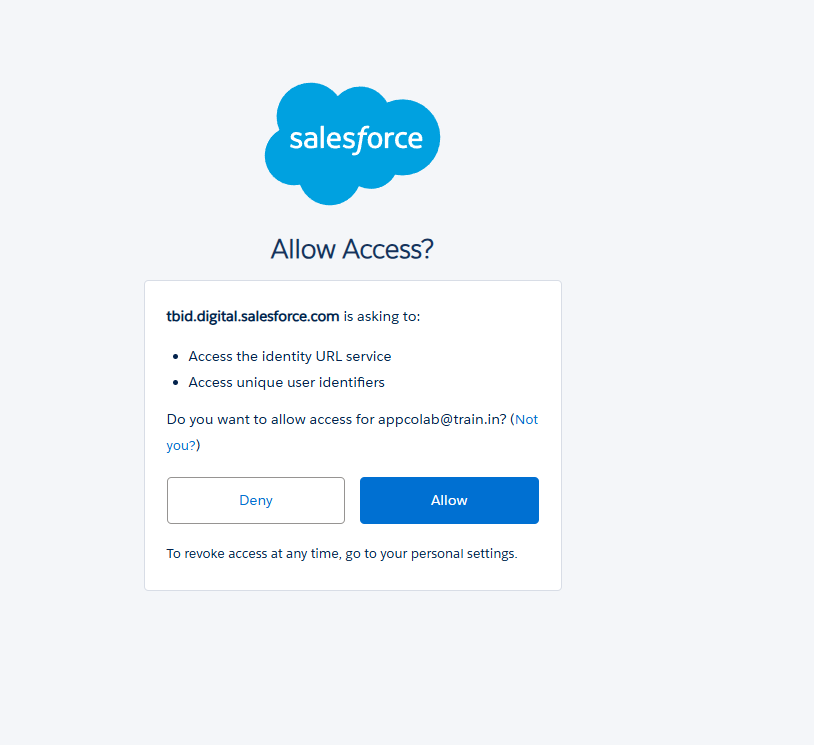
Allow access if prompted. Only asked if you are setting it up for the first time.
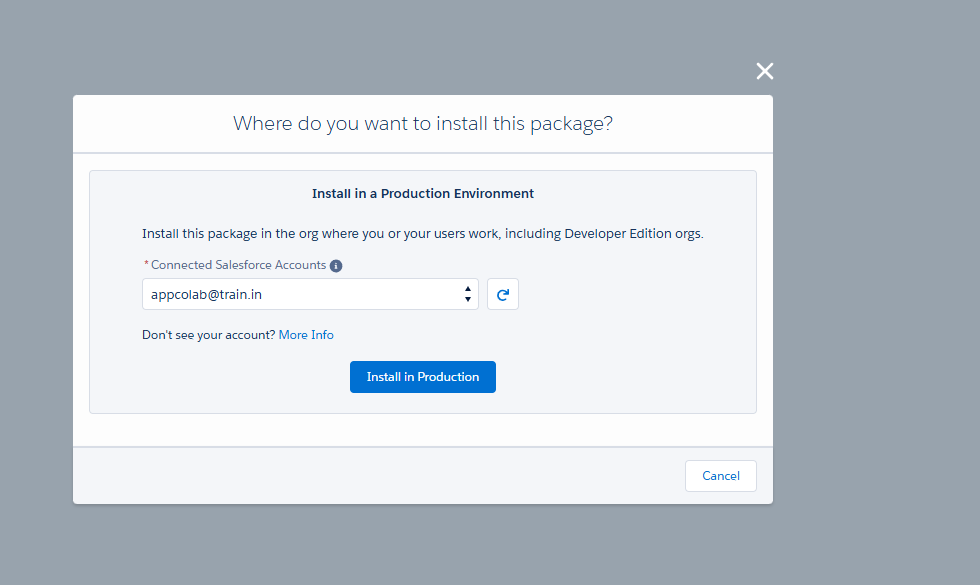
Step 3: Choose Environment
You will be asked where to install the package. If the environment you want to install is not visible in the dropdown, you can can add it under “Connected Accounts” section in your trailhead profile:
- Install in Production: This is your live environment.
- Install in Sandbox: (Recommended) This is to try out new features without affecting your live data.
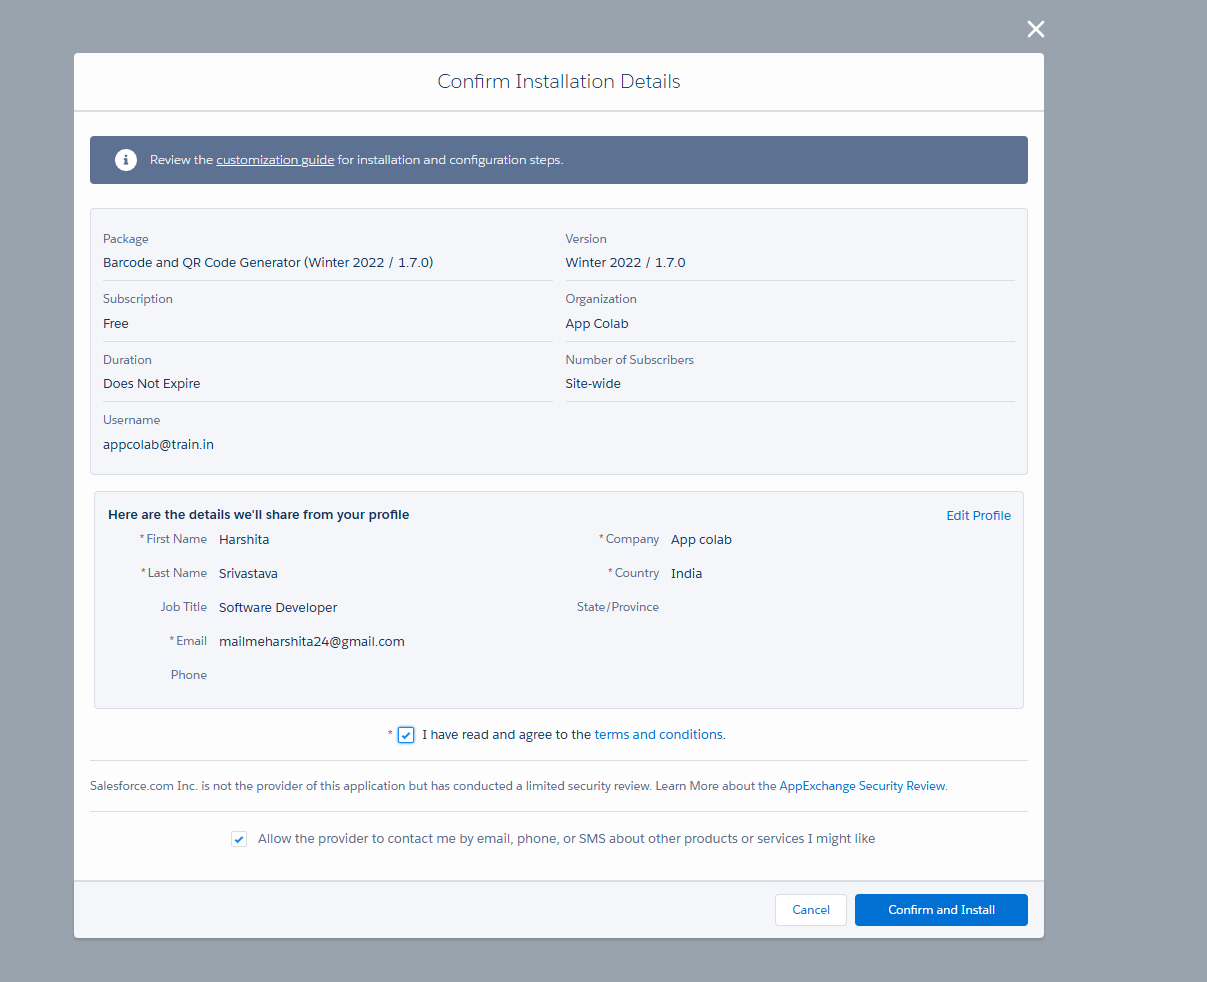
Step 2: Confirm Installation Details
You will see a summary of the package details (Version, Name, Provider). Check the box to agree to the Terms and Conditions and click Confirm and Install.
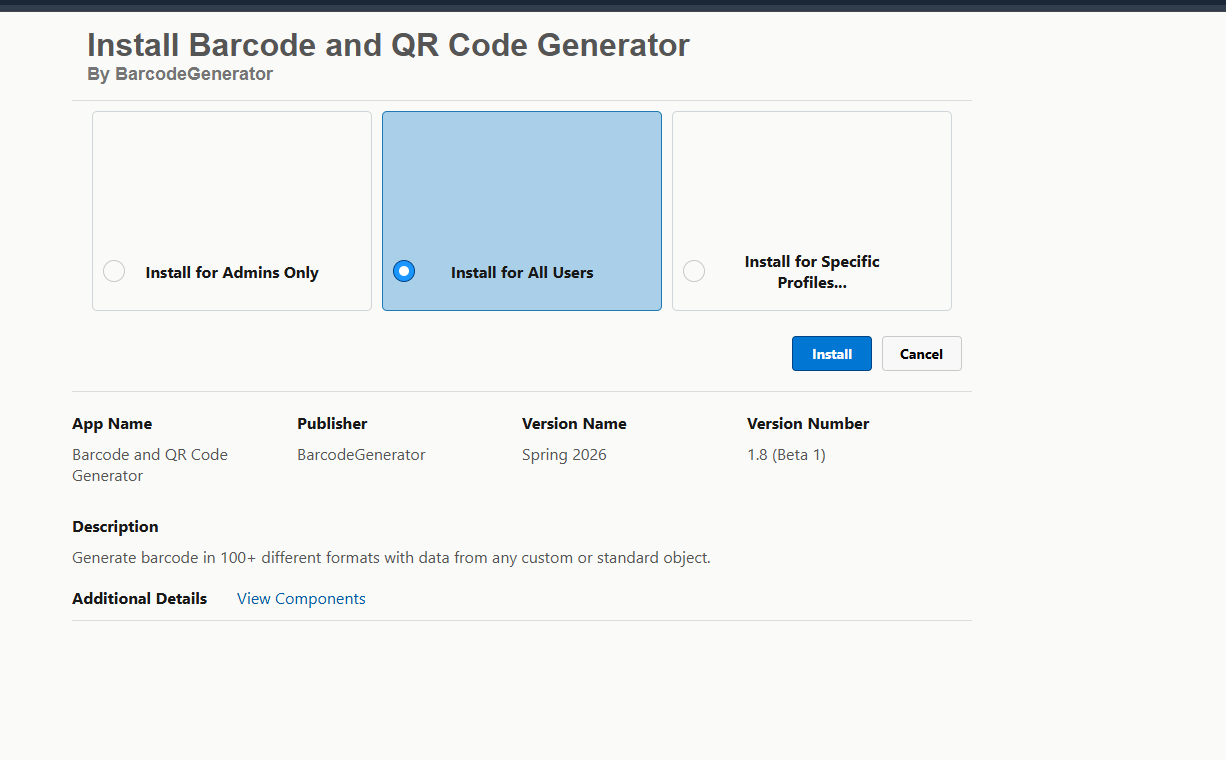
Step 3: Select Security Level
You will see three options for who gets access to this package:
- Install for Admins Only: (Best Practice) Only System Admins can use the app initially. You can give access to other users later via Permission Sets.
- Install for All Users: Everyone in your org gets access immediately.
- Install for Specific Profiles: You manually select which profiles get access.
Step 4: Complete Installation
Click Install. The installation process may take several minutes. Once complete, you will receive a confirmation email.
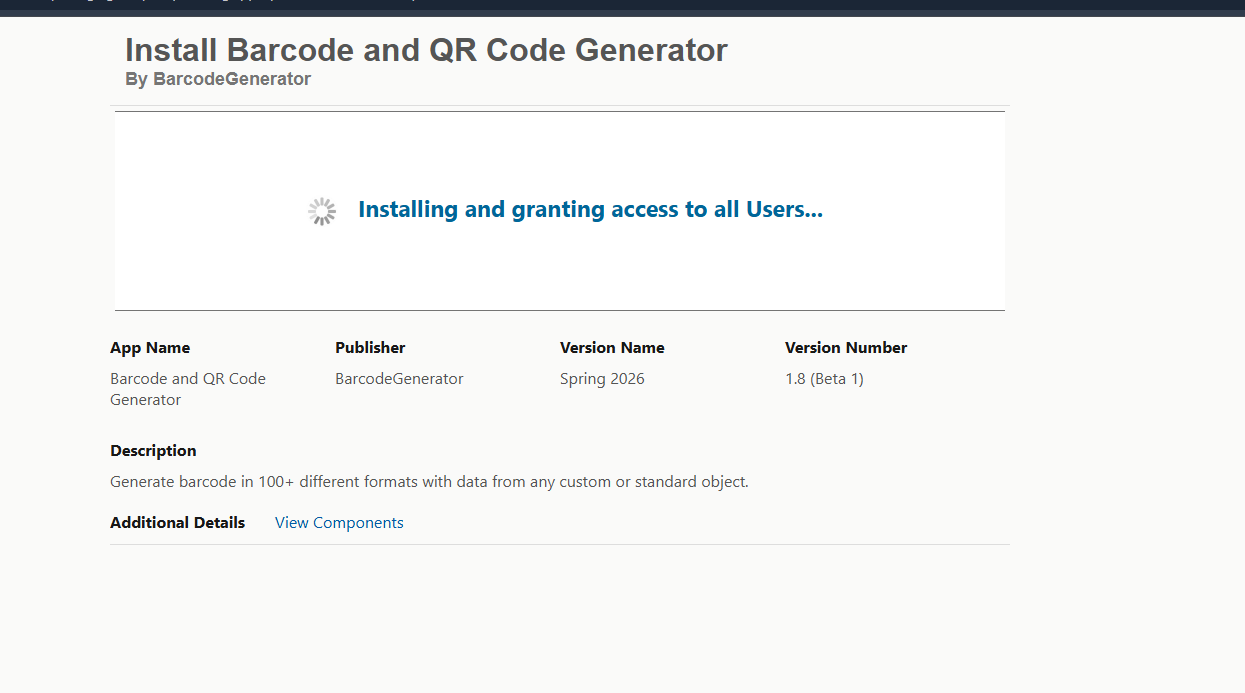
- Small Packages: Usually install within a few minutes.You will see an “Installation Complete” screen immediately.
- Large Packages: You will see a message saying, “The app is taking a long time to install. You will receive an email after the installation completes.” You can close the window and wait for the email.
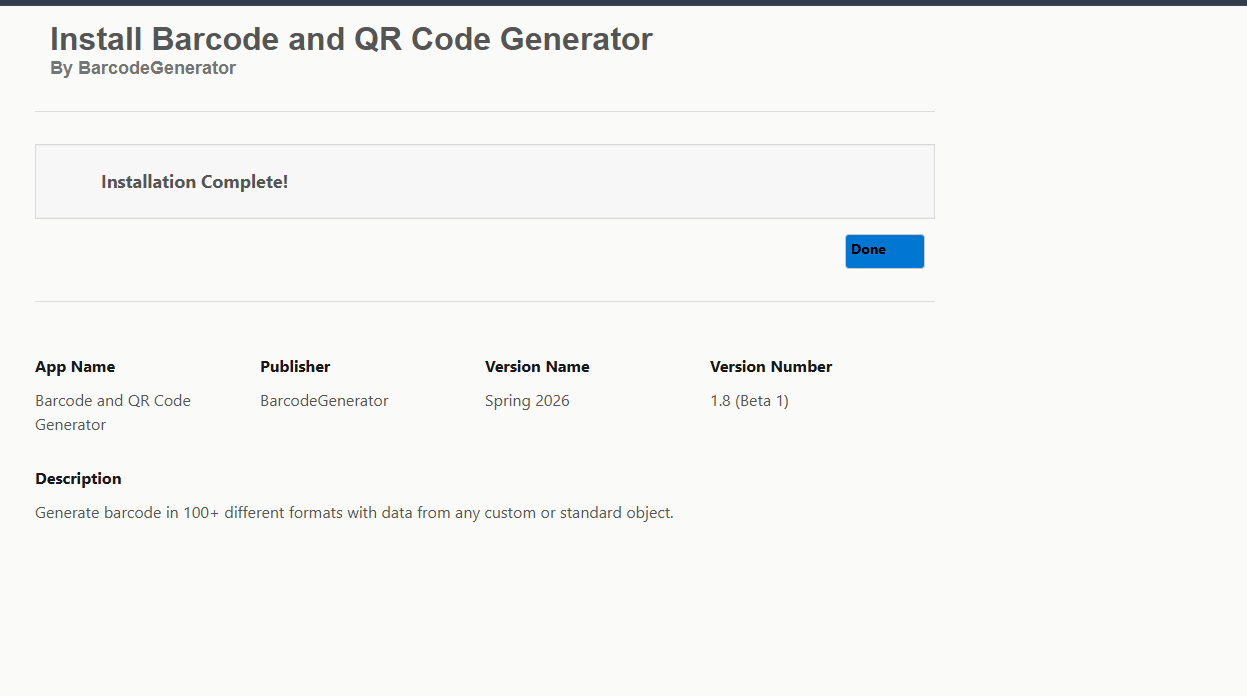
- After installation, click on Done to exit the installer.
-
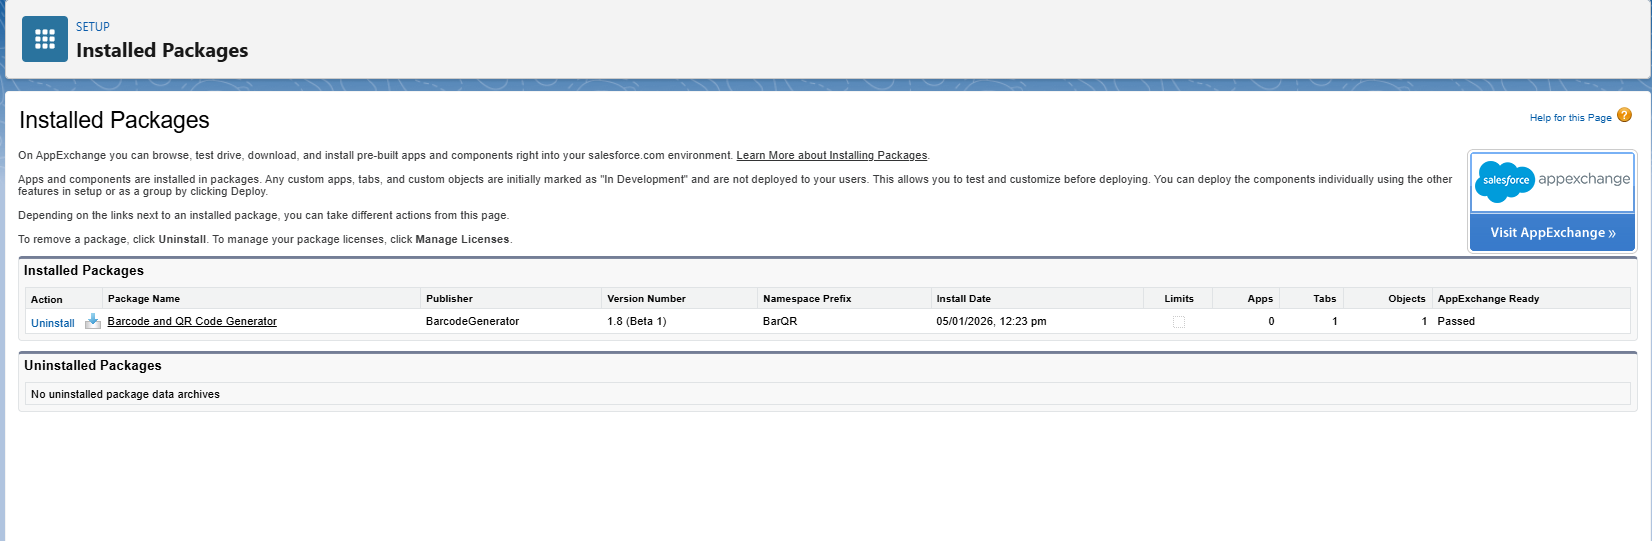
Check Installation Status: If you want to check the status, go to Setup > Packaging > Installed Packages. The status will show as “Installed” once complete with the name Barcode & QR Code Generator.
-
You are now ready to configure the app and assign permissions to users as needed. Proceed to the next section on Configuration to set up permission sets and other settings.