Grid Actions
Grid Actions let you trigger business logic directly from a grid. They appear as toolbar buttons (above the grid) or as row-level actions (next to each record). AppColab Grid supports both Standard Actions (configured with point-and-click ease) and Custom Actions (Flow, Apex, or URL).
Add an action
On the Action Details step of the wizard:
- Click New Action.
- Configure the action properties (on either the Standard or Custom tab).
- Click Save on the action dialog.
- Repeat to add more actions.
- Click Save & Next.
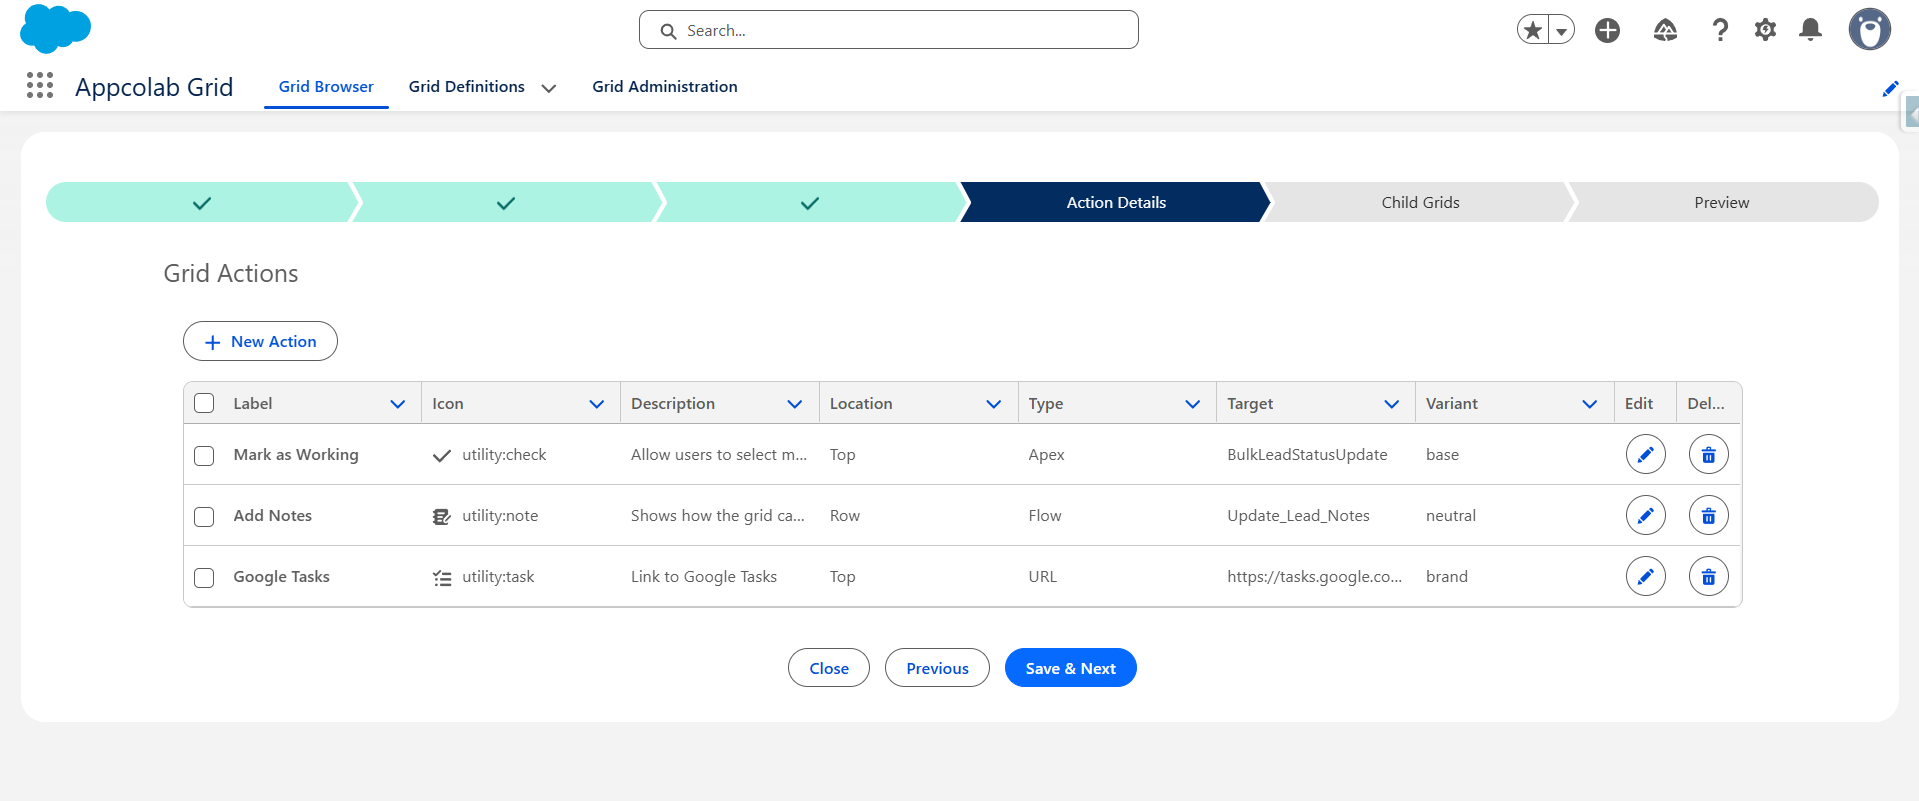
Action attributes
| Attribute | Description |
|---|---|
| Label | What the user sees on the button. |
| Icon | A Lightning Design System icon name (for example, utility:refresh). |
| Description | Tooltip shown on hover. |
| Location | Top (toolbar) or Row (per-row action menu). |
| Type | Standard (for Email/Create/Update actions) or Flow, Apex, URL (for Custom actions). |
| Target | The Flow API name, the Apex class name, or the URL template (for Custom actions; blank for Standard actions). |
| Variant | Button styling — brand, neutral, destructive, success, etc. |
Standard actions
Standard actions allow you to execute common tasks without writing code, custom flows, or setting up custom Apex targets. You configure these on the Standard tab of the Action Modal:
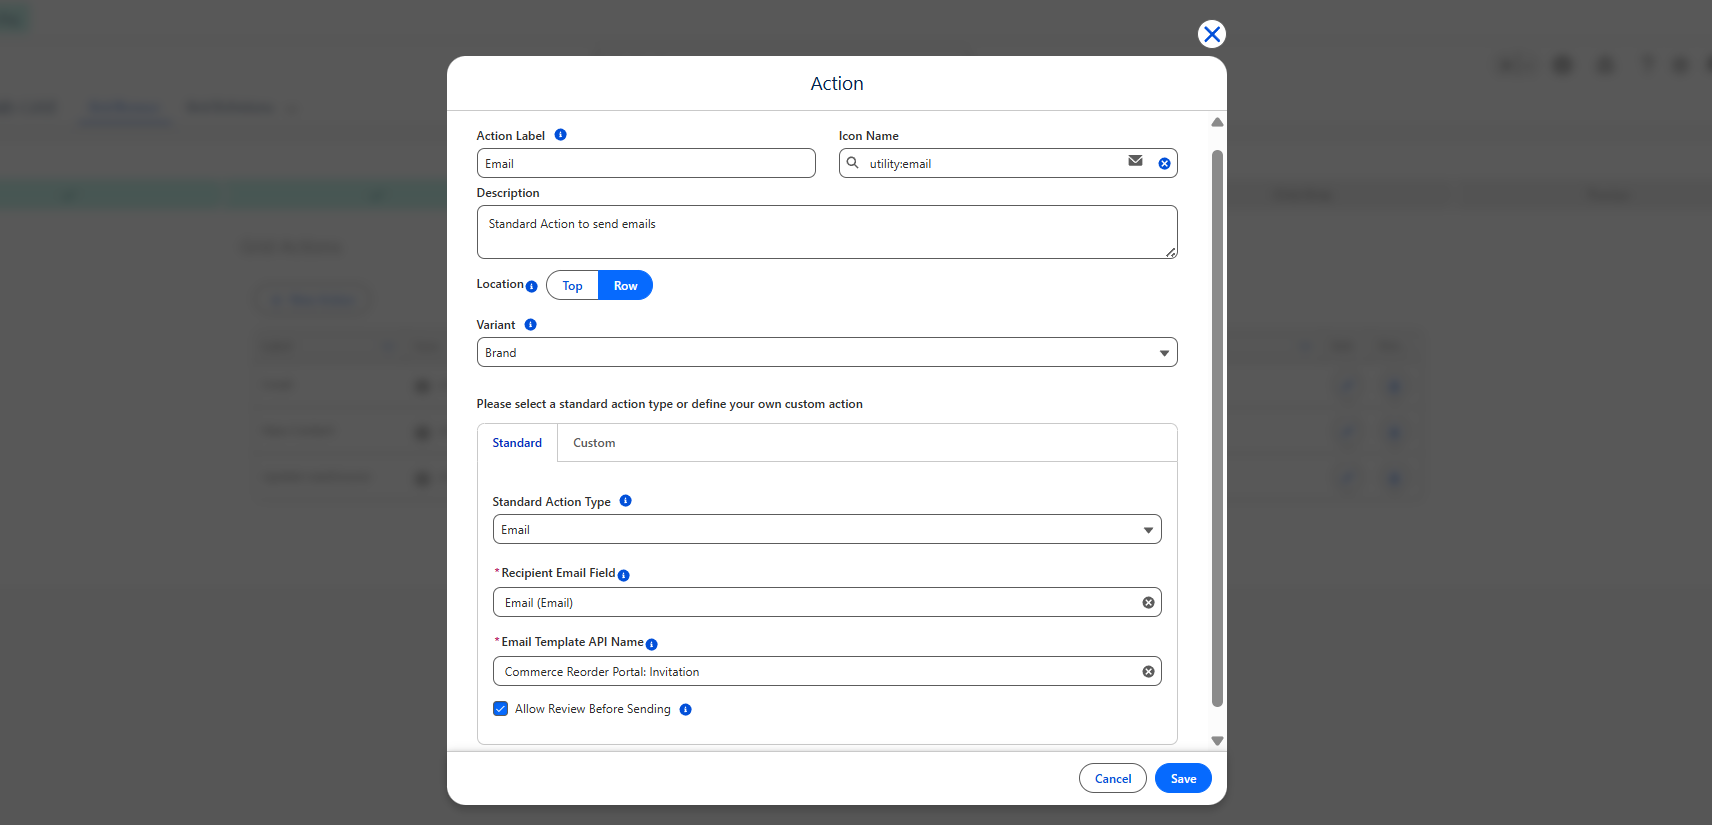
1. Send Email Action
Sends templated emails to users, contacts, or leads:
- Recipient Field: Select a field containing the recipient. Supports standard Email fields, String fields, or Reference fields pointing to
Contact,Lead, orUserrecords. - Email Template: Pick from your Salesforce Classic or Lightning email templates.
- Behavior: Clicking the action dispatches the email using Apex.
2. Create Record Action
Allows users to create a new related or independent record directly from the grid:
- Target Object: Search and select standard or custom objects. If the object has a lookup pointing to the parent grid record, you can auto-populate and lock the parent reference using the
Parent Relationship Field. - Field Mappings: Map grid row values or static values to populate on the newly created record.
- User Review: Toggle Allow Review Before Saving to display a standard Salesforce creation modal for final user adjustments before insertion.
3. Update Record Action
Quickly update fields on selected records:
- Field Mappings: Specify which fields on the current object should be updated and set their new values (either static or derived from row values).
- User Review: Toggle Allow Review Before Saving to present a confirmation screen before updating database records.
Custom actions
Flow actions
Use a Flow action to run a Screen Flow from the grid.
- Target: the API name of the Flow (for example,
Update_Opportunity_Stage). - When placed at Row level, the current row’s record ID is passed to the Flow automatically as a
recordIdvariable. - When placed at Top level with multi-select enabled, the selected record IDs are passed as a collection (
recordIds). Add an input variable of that name to your Flow to receive it. - The Flow runs in a modal. When the Flow finishes, the grid refreshes.
Example: a Flow action that asks a sales rep to pick a new stage and updates the selected opportunities.
Apex actions
Use an Apex action for logic that does not need a screen — for example, a bulk status change, a callout, or a custom validation.
Step 1: Write the Apex class
Create a class implementing GridApexActionInterface:
global class CloseOpportunitiesAsWon implements GridApexActionInterface {
    global Object execute(sObject[] records) {
        List<Opportunity> opps = (List<Opportunity>) records;
        for (Opportunity o : opps) {
            o.StageName = 'Closed Won';
            o.CloseDate = Date.today();
        }
        update opps;
        return opps.size() + ' opportunities closed.';
    }
}
Requirements:
- The class must be
global(so it can be invoked from a managed/unmanaged boundary). - It must implement
GridApexActionInterfaceand provide anexecutemethod that acceptssObject[]. - The string returned from
executeis shown to the user as a success toast. Returnnullto skip the toast. - Respect FLS/CRUD and use
WITH USER_MODEif appropriate — the grid itself already runs queries in user mode.
Step 2: Register the action in the grid
- Type:
Apex - Target: the Apex class name (for example,
CloseOpportunitiesAsWon) - Location:
Top(for bulk) orRow(for a single record)
When the user invokes the action, the grid passes the relevant record(s) to execute, shows a spinner, and refreshes when the method returns.
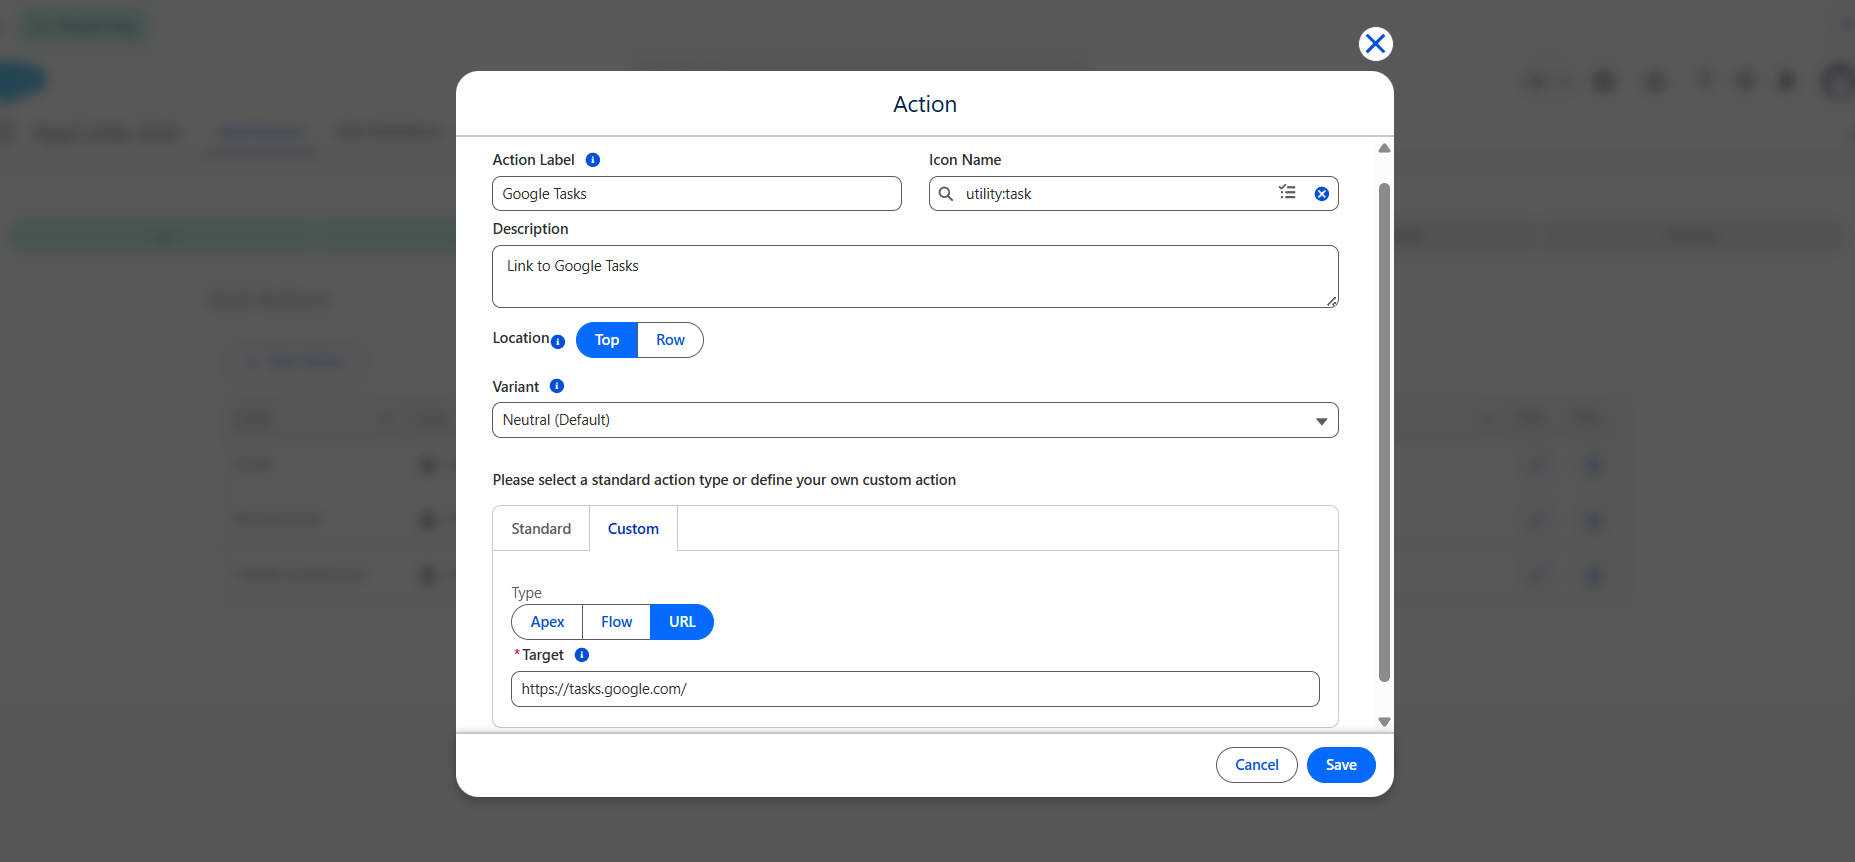
URL actions
Use a URL action to navigate somewhere — another record, a dashboard, an external tool.
- Target: the URL template. You can reference fields from the current row using
{FieldApiName}placeholders. - Examples:
/lightning/r/Account/{AccountId}/view— open the parent Account record.https://example.com/reports?email={Email}— open an external page with row context.
- Place URL actions on Row to make them per-record, or Top for a general-purpose link.
Row actions vs. toolbar actions
- Toolbar (Top) actions are good for actions that apply to selected or all records: bulk stage changes, “Email selected”, “Refresh data from source”.
- Row actions are good for actions tied to a single record: “Open in external system”, “Run credit check for this account”.
Recommendations
- Keep a grid to a handful of actions — more than five or six becomes hard to scan.
- Use clear, verb-first labels (“Send Reminder”, “Mark Paid”) instead of nouns.
- Prefer Flow for anything interactive, Apex for silent bulk operations, URL for simple navigation.