
QuickBooks Grid Integration
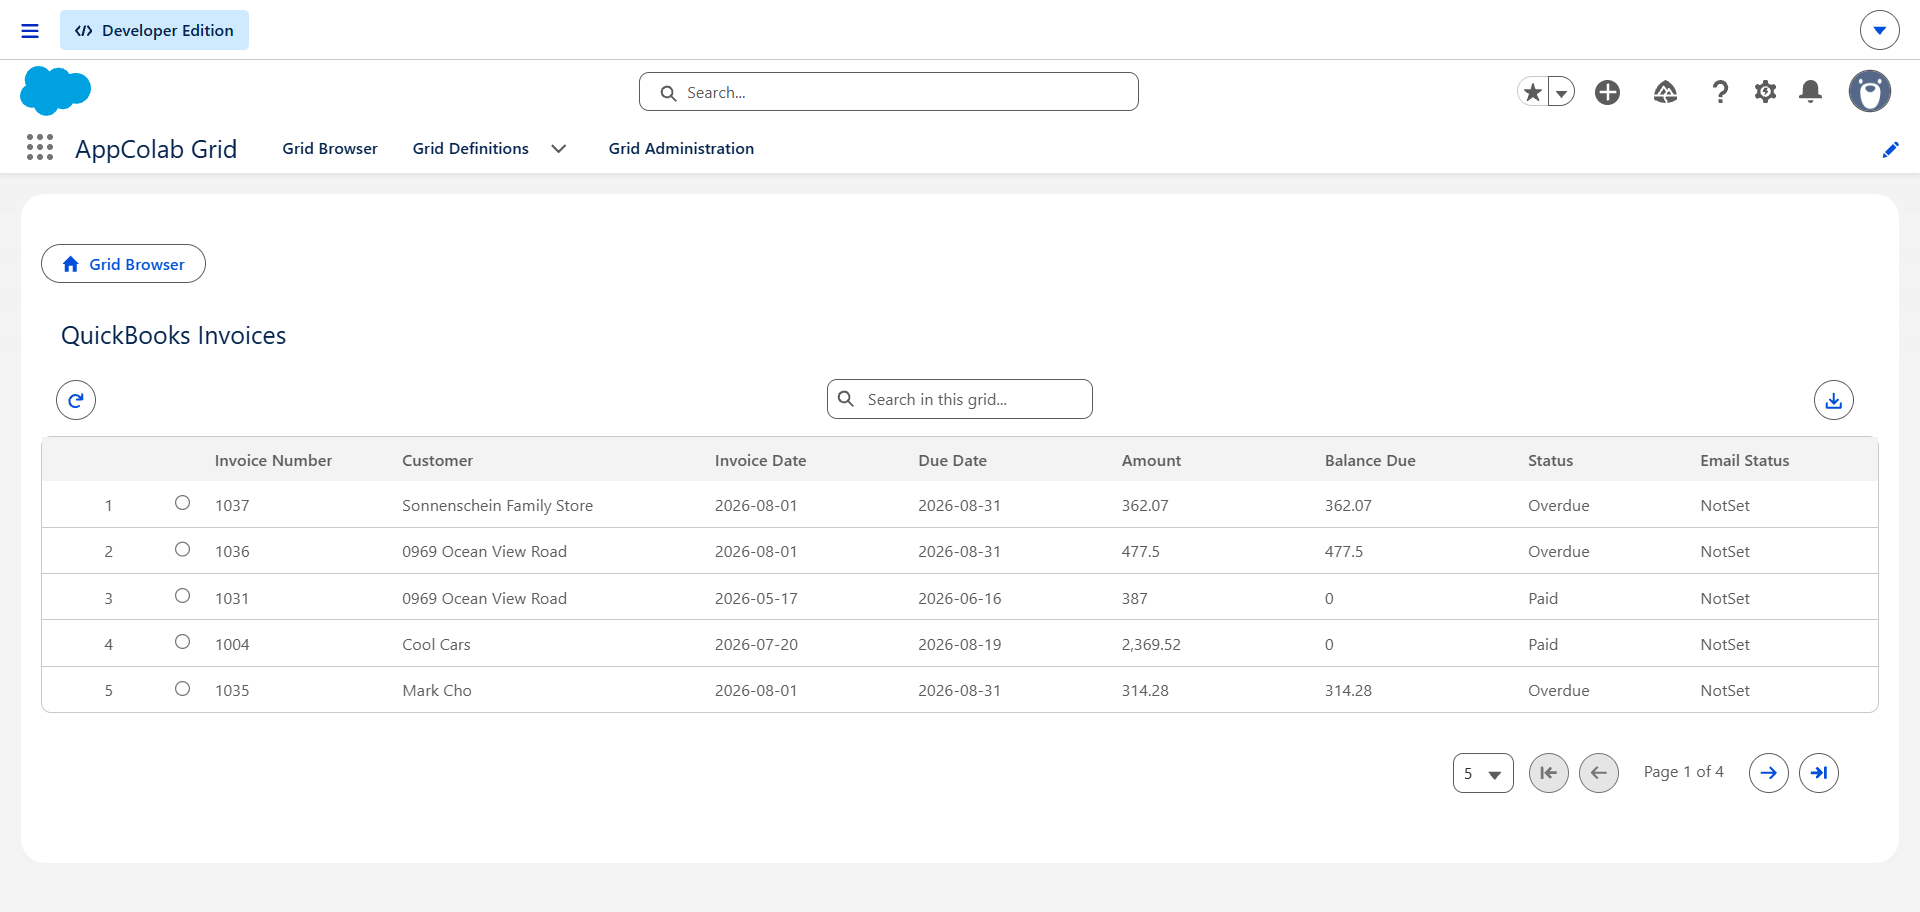
The QuickBooks Grid integration enables finance, accounting, and sales operations teams to view, search, inline-edit, and export financial records from QuickBooks Online (Invoices, Customers, Payments, and Bills) directly inside AppColab Grid.
What’s Deployed
| Component | Name | Purpose |
|---|---|---|
| Named Credential | QuickBooks |
Connects to https://quickbooks.api.intuit.com via QuickBooks External Credential |
| External Credential | QuickBooks |
OAuth 2.0 / Custom bearer token authentication |
| Apex Client | QuickBooksClient.cls |
REST client supporting listInvoices, listCustomers, listPayments, createInvoice, updateInvoice, deleteInvoice |
| Apex Data Provider | QuickBooksGridDataProvider.cls |
Implements appcg.GridDataProviderV1 and appcg.GridDataMutationProviderV1 with full CRUD |
| Permission Set | Integration_Admin |
Grants access to QuickBooks → ApiKey external credential principal |
One-Time Manual Setup
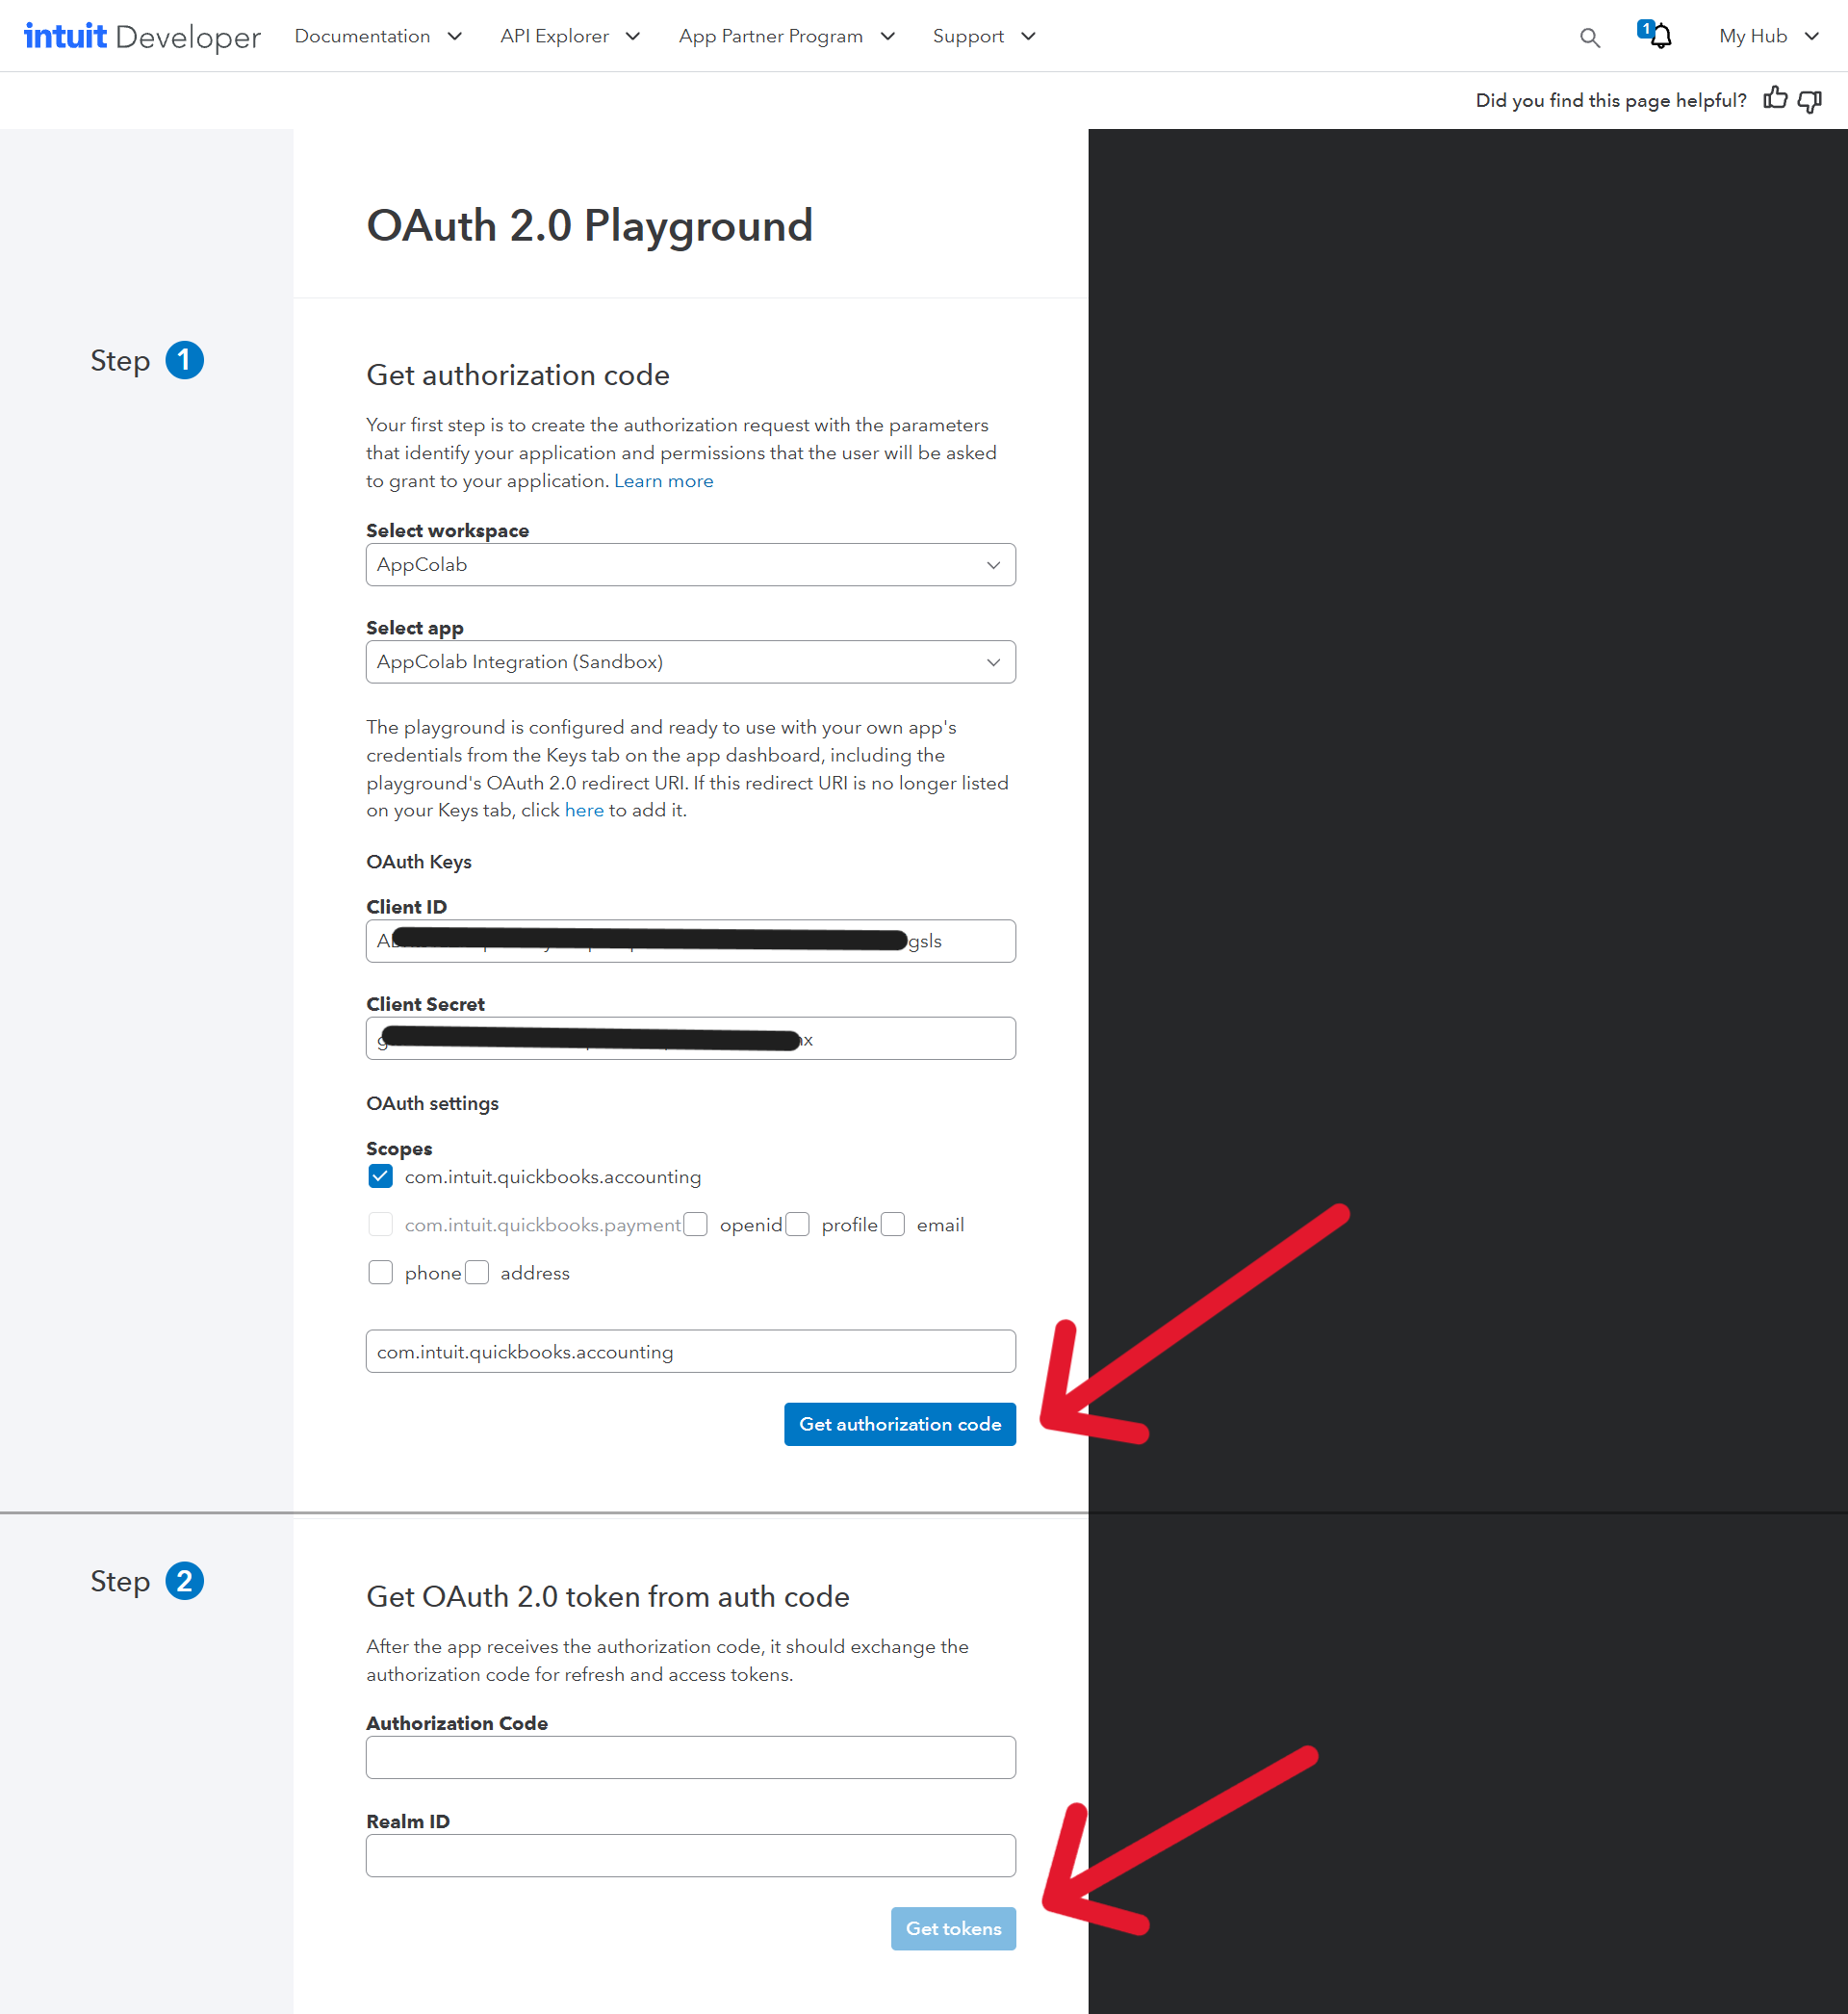
1. Obtain Your QuickBooks App Credentials
- Go to the Intuit Developer Portal and sign in.
- Under Dashboard, open your App (or create an App with the Accounting API).
- Under Keys & OAuth, copy your Client ID and Client Secret.
- Under OAuth 2.0 Playground, generate an Access Token and copy your Realm ID (Company ID).
2. Configure Credentials in Salesforce Setup
2.1 Create the External Credential
- Go to Setup (gear icon ⚙️ → Setup).
- In the Quick Find box, enter Named Credentials and select Named Credentials.
- Click the External Credentials tab → click New:
- Label:
QuickBooks - Name:
QuickBooks - Authentication Protocol:
Custom - Click Save.
- Label:
- In the Principals section, click New:
- Parameter Name:
ApiKey - Sequence:
1 - Click Save.
- Parameter Name:
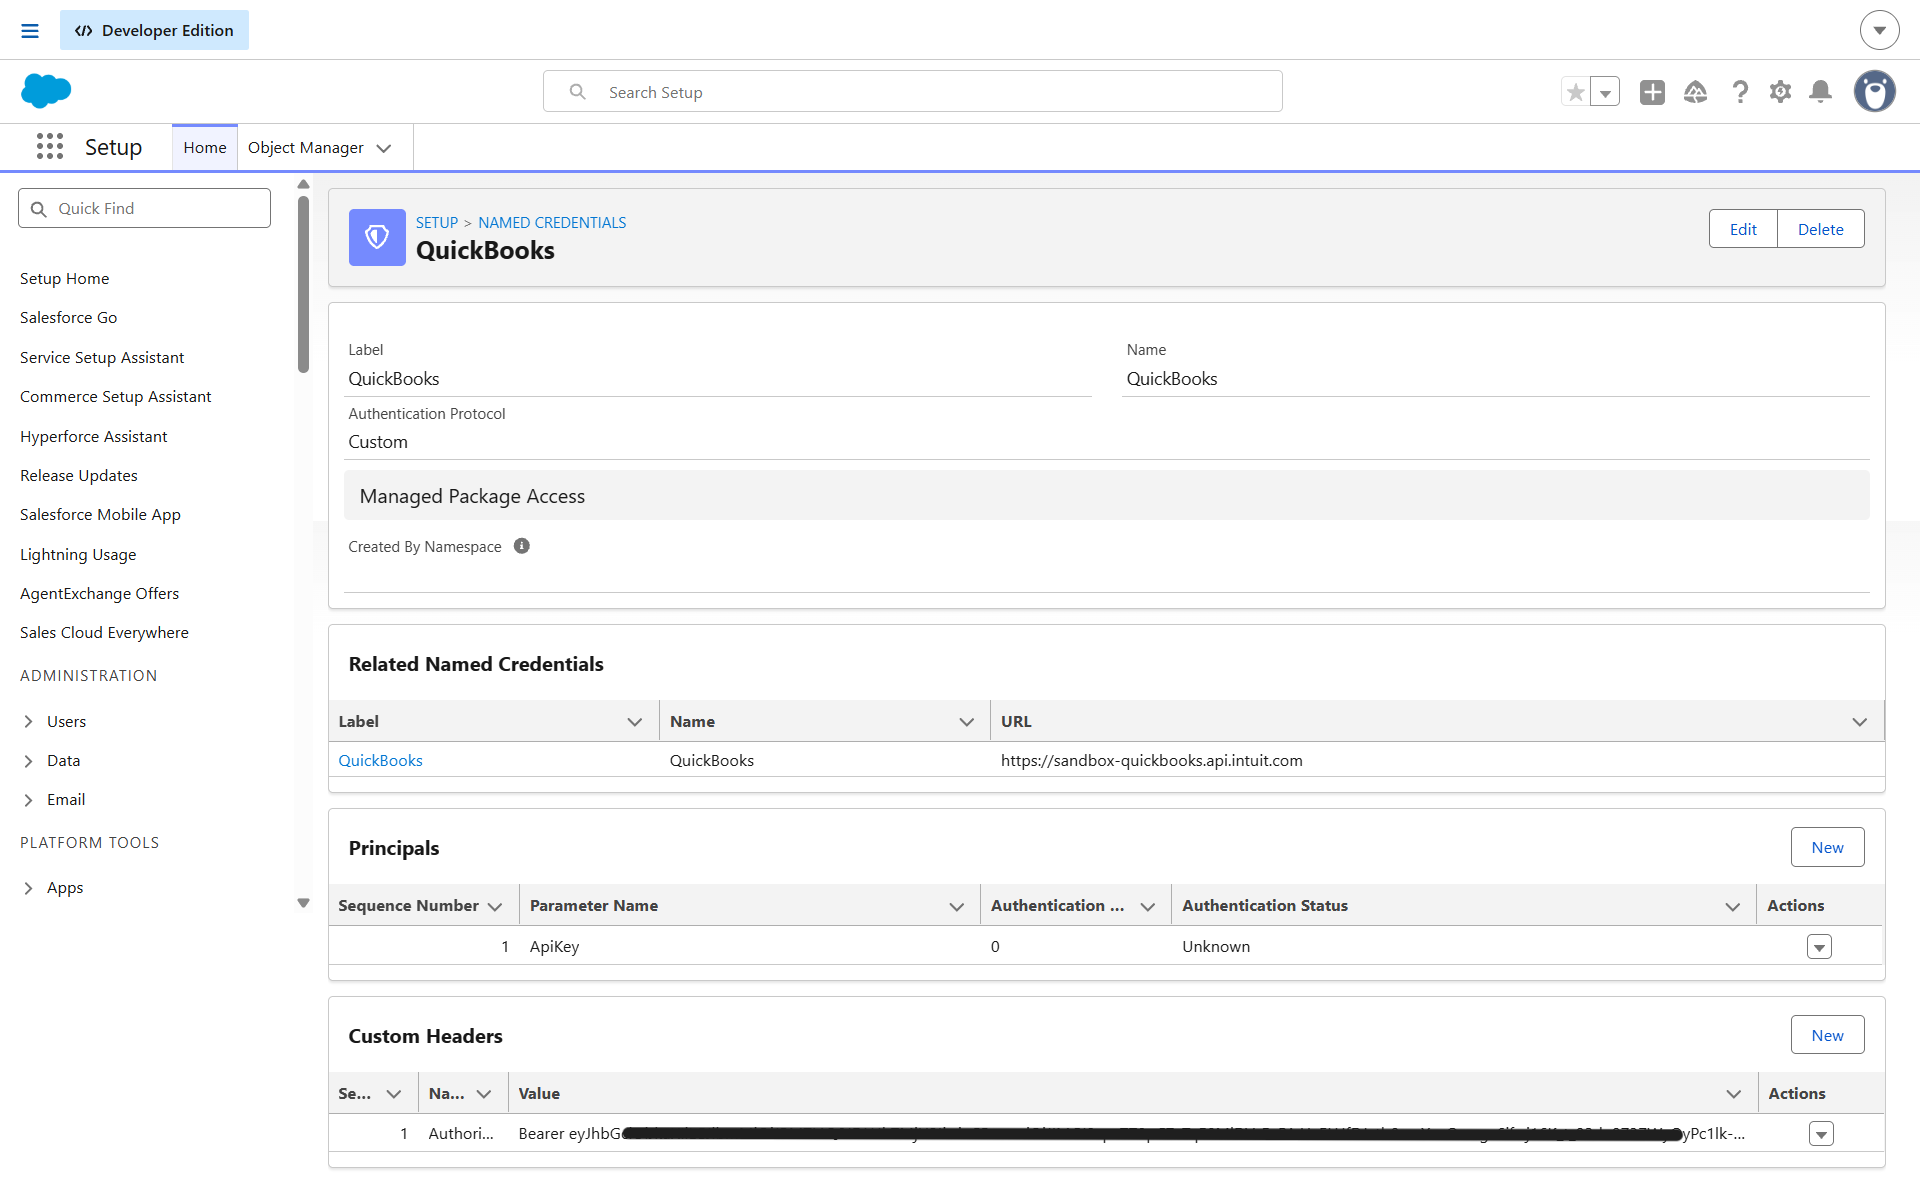
- In the Custom Headers section, click New:
- Name:
Authorization - Value:
Bearer YOUR_QUICKBOOKS_ACCESS_TOKEN(paste your OAuth access token from Step 1) - Sequence Number:
1 - Click Save.
- Name:
2.2 Create the Named Credential
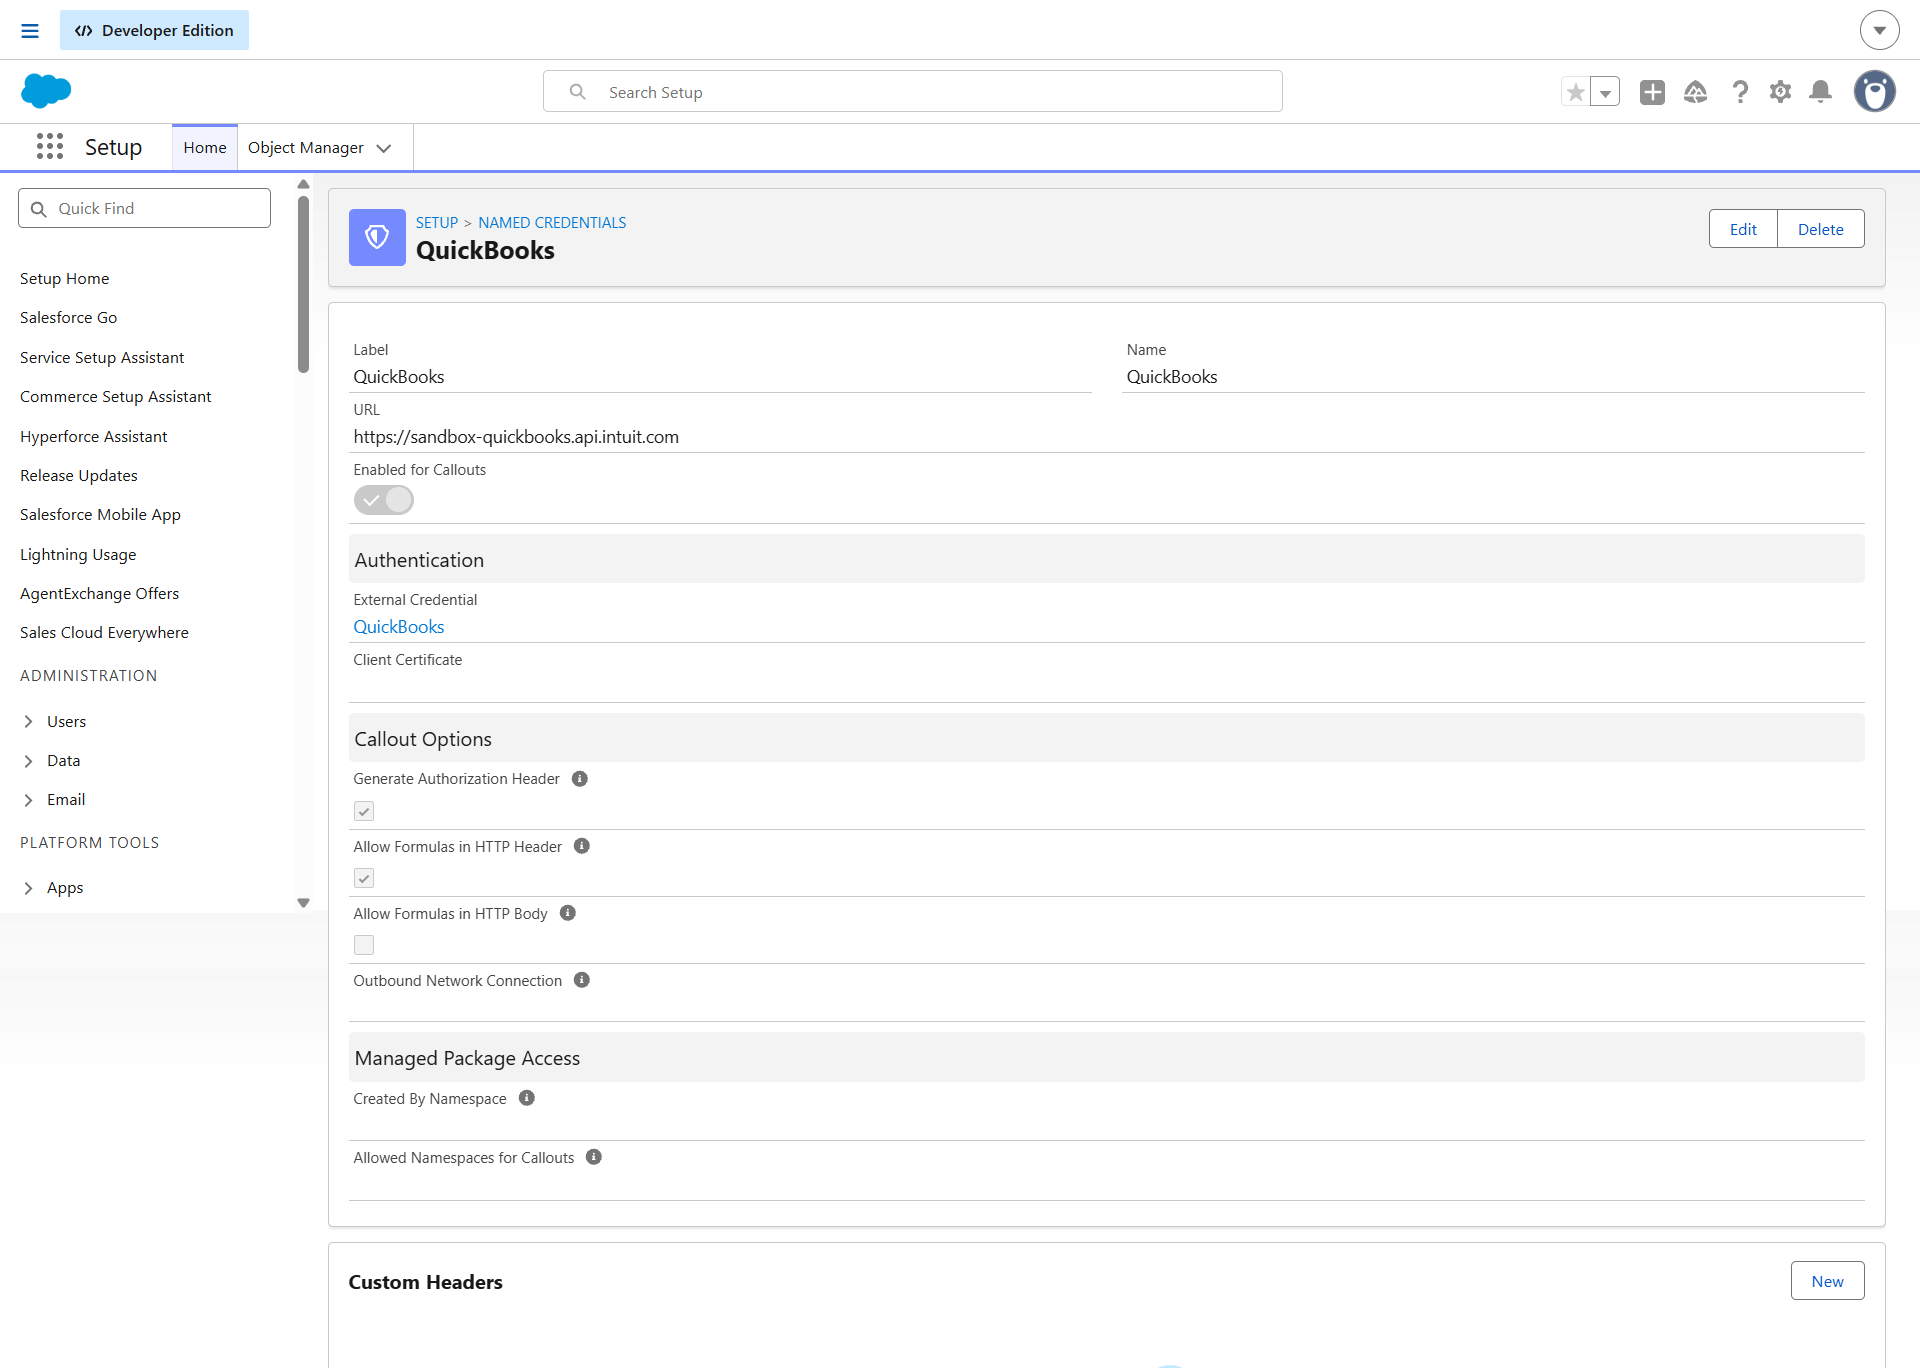
- Click the Named Credentials tab (next to External Credentials) → click New:
- Label:
QuickBooks - Name:
QuickBooks - URL:
https://quickbooks.api.intuit.com(or sandbox:https://sandbox-quickbooks.api.intuit.com) - External Credential: Select
QuickBooks - Generate Authorization Header: Leave Unchecked
- Allow Formulas in HTTP Header: Checked
- Label:
- Click Save.
3. Assign Permission Set Access
- In Salesforce Setup, enter Permission Sets in Quick Find.
- Select Integration Admin (or
Appcolab Grid Admin). - Click External Credential Principal Access → click Edit.
- Add
QuickBooks - ApiKeyto Enabled External Credential Principals. - Click Save and verify the permission set is assigned to your Salesforce users.
Creating a QuickBooks Grid Definition
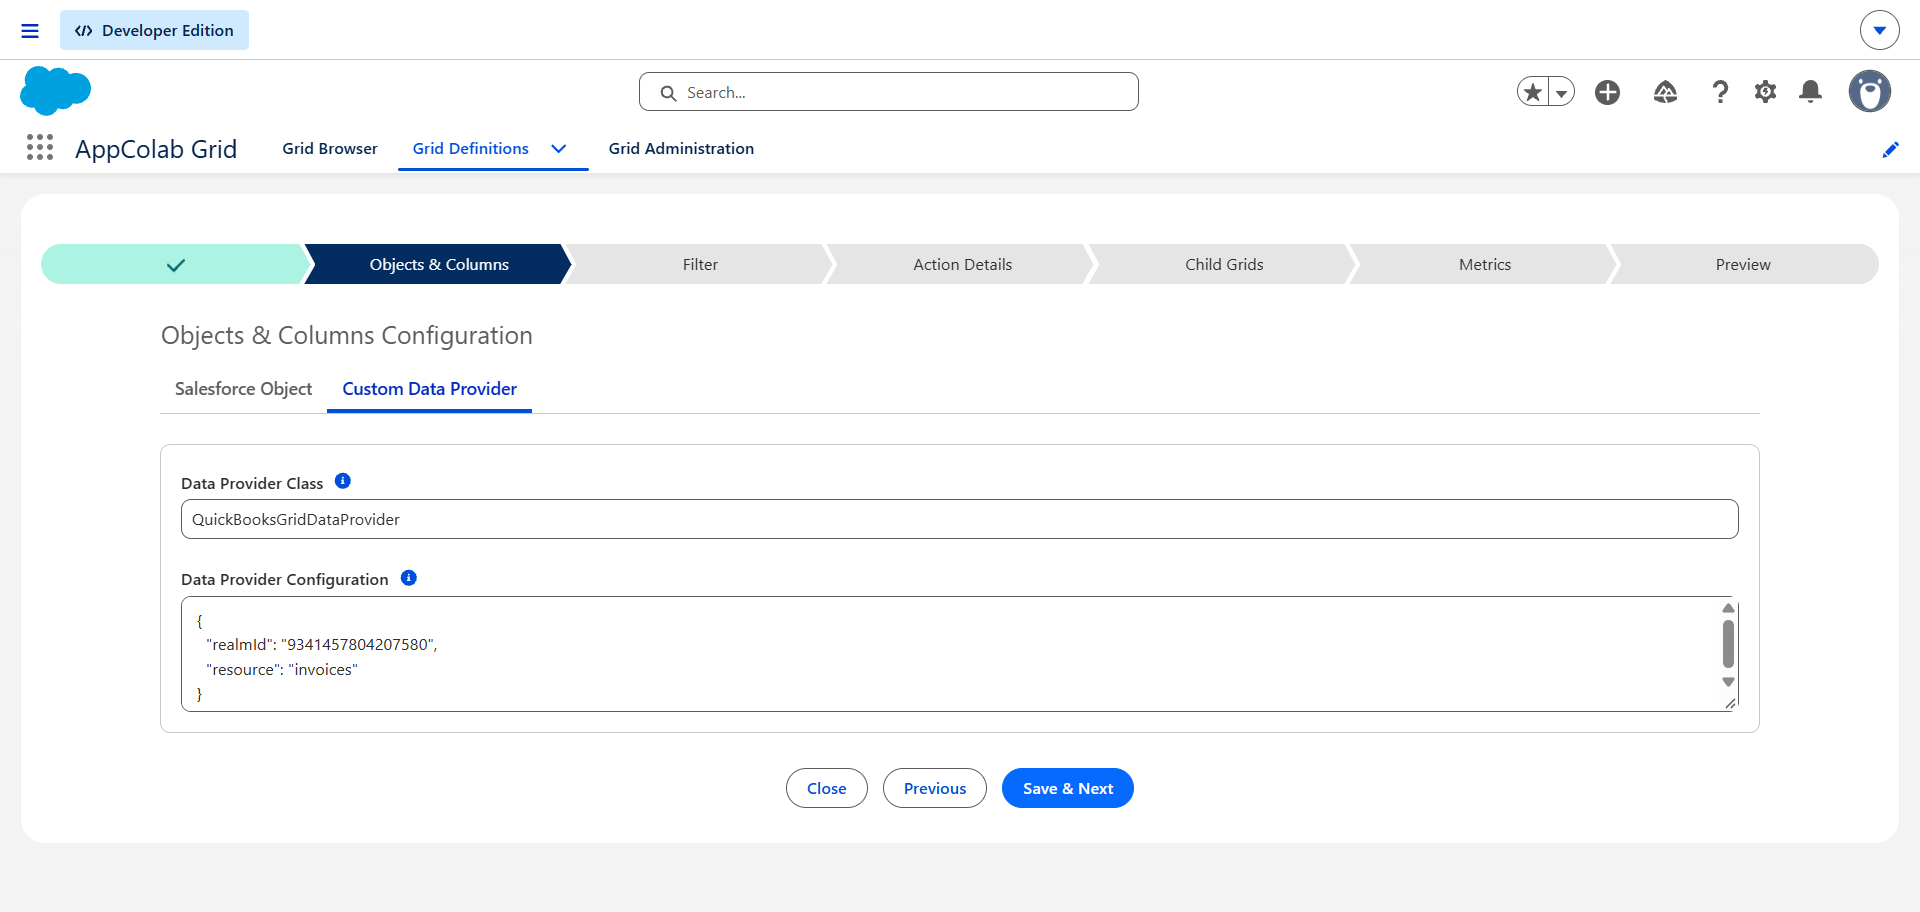
- In Salesforce, open AppColab Grid app → Grid Definitions tab → click New Grid Definition.
- Fill in:
- Grid Settings Name:
QuickBooks_Invoices_Grid - Grid Label:
QuickBooks Invoices - Is Active?: Checked
- Data Provider Class:
QuickBooksGridDataProvider - Data Provider Configuration:
{ "realmId": "123456789012345", "resource": "invoices" }Tip: Set
"resource"to"customers","payments", or"bills"to display different financial objects.
- Grid Settings Name:
- Click Save & Next → proceed to Preview.
- Live invoices load with Invoice Number, Customer, Amount, Balance, Due Date, and Status!
Supported Grid Features
| Resource | Supported Actions | Columns |
|---|---|---|
| Invoices | View, Search, Inline Edit, Create, Delete | Invoice Number, Customer, Date, Due Date, Total Amount, Balance, Status |
| Customers | View, Search, Inline Edit, Create | Display Name, Company, Email, Phone, Balance, Active |
| Payments | View, Search, Export | Payment Ref, Customer, Total Amount, Unapplied Amount, Date |
| Bills | View, Search, Filter | Vendor, Bill Date, Due Date, Total Amount, Balance, Status |
Troubleshooting
401 Unauthorized: Token expired or invalid: Refresh your Intuit access token in your external credential.400 Bad Request: Invalid Company ID: Double check that the"realmId"property in your Data Provider Configuration JSON matches your Intuit Company ID.