
Xero Grid Integration
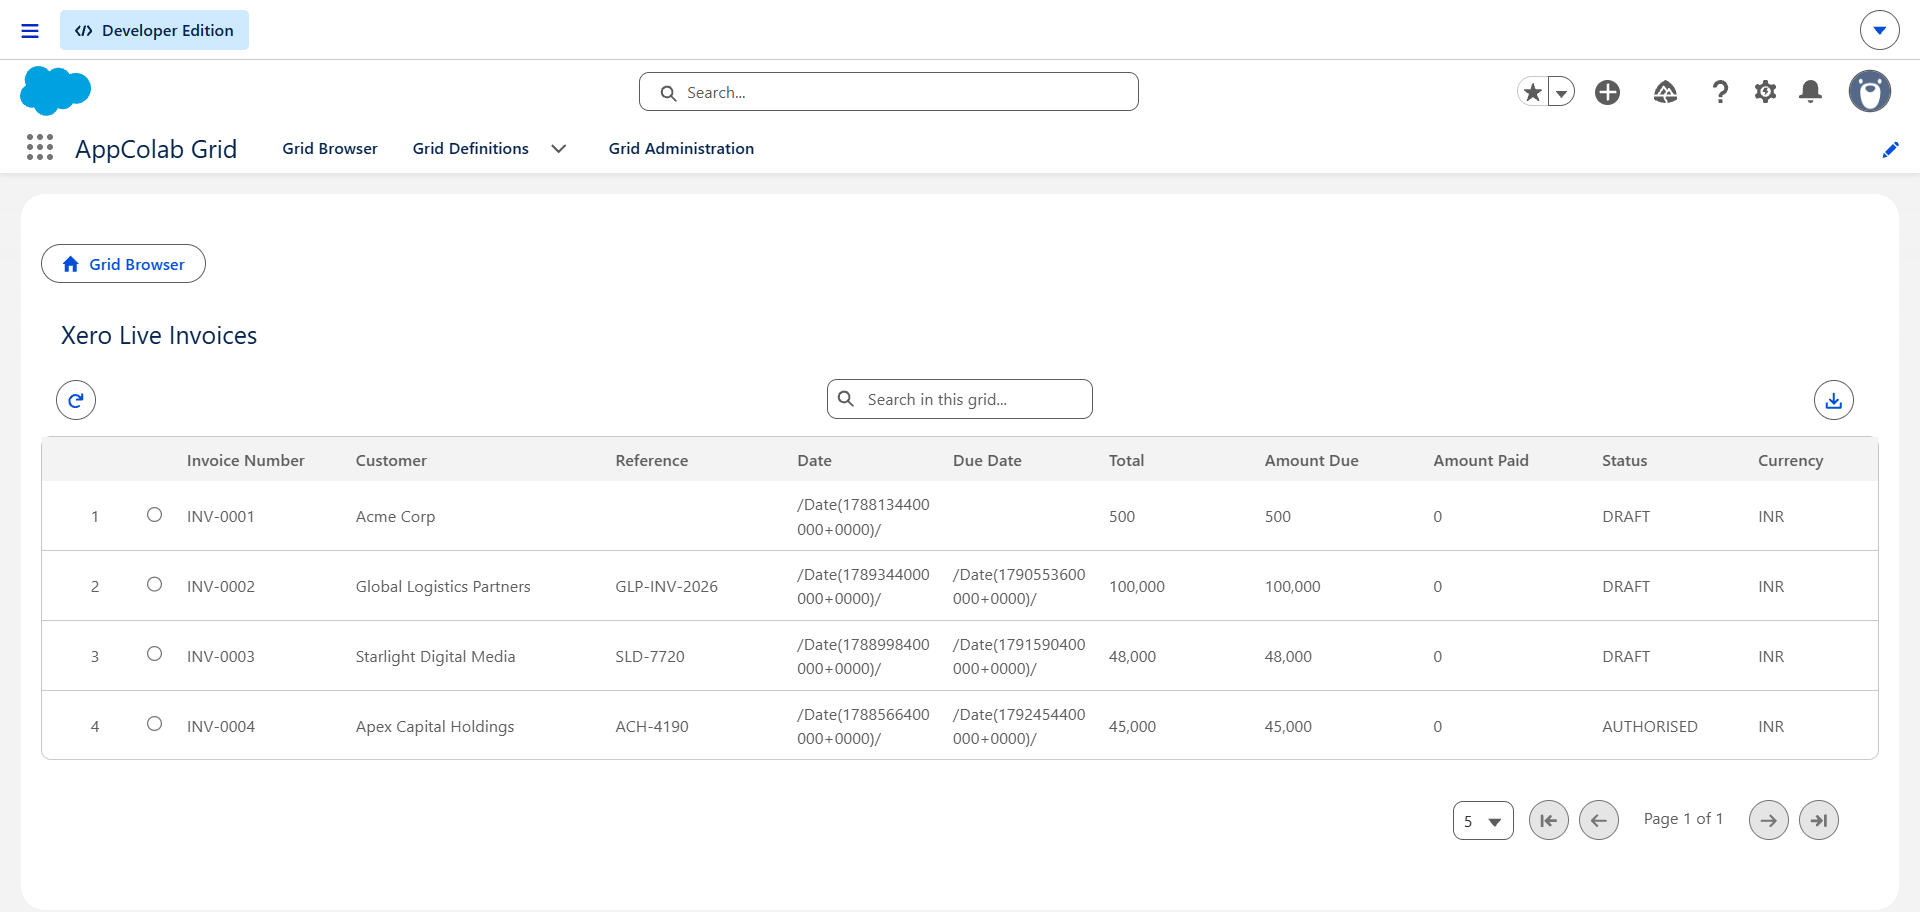
The Xero Grid integration connects Salesforce to Xero Accounting, allowing teams to view, search, and export live accounting records (Invoices, Bills, Contacts, Accounts, and Payments) directly inside AppColab Grid.
What’s Deployed
| Component | Name | Purpose |
|---|---|---|
| Named Credential | Xero |
Connects to https://api.xero.com via Xero External Credential |
| External Credential | Xero |
OAuth 2.0 / Auth Provider authentication |
| Apex Client | XeroClient.cls |
REST client supporting listInvoices, listContacts, listAccounts, listPayments, getConnections |
| Apex Data Provider | XeroGridDataProvider.cls |
Implements appcg.GridDataProviderV1 with server-side pagination and multi-resource support |
| Permission Set | Integration_Admin |
Grants access to Xero external credential principal |
One-Time Manual Setup
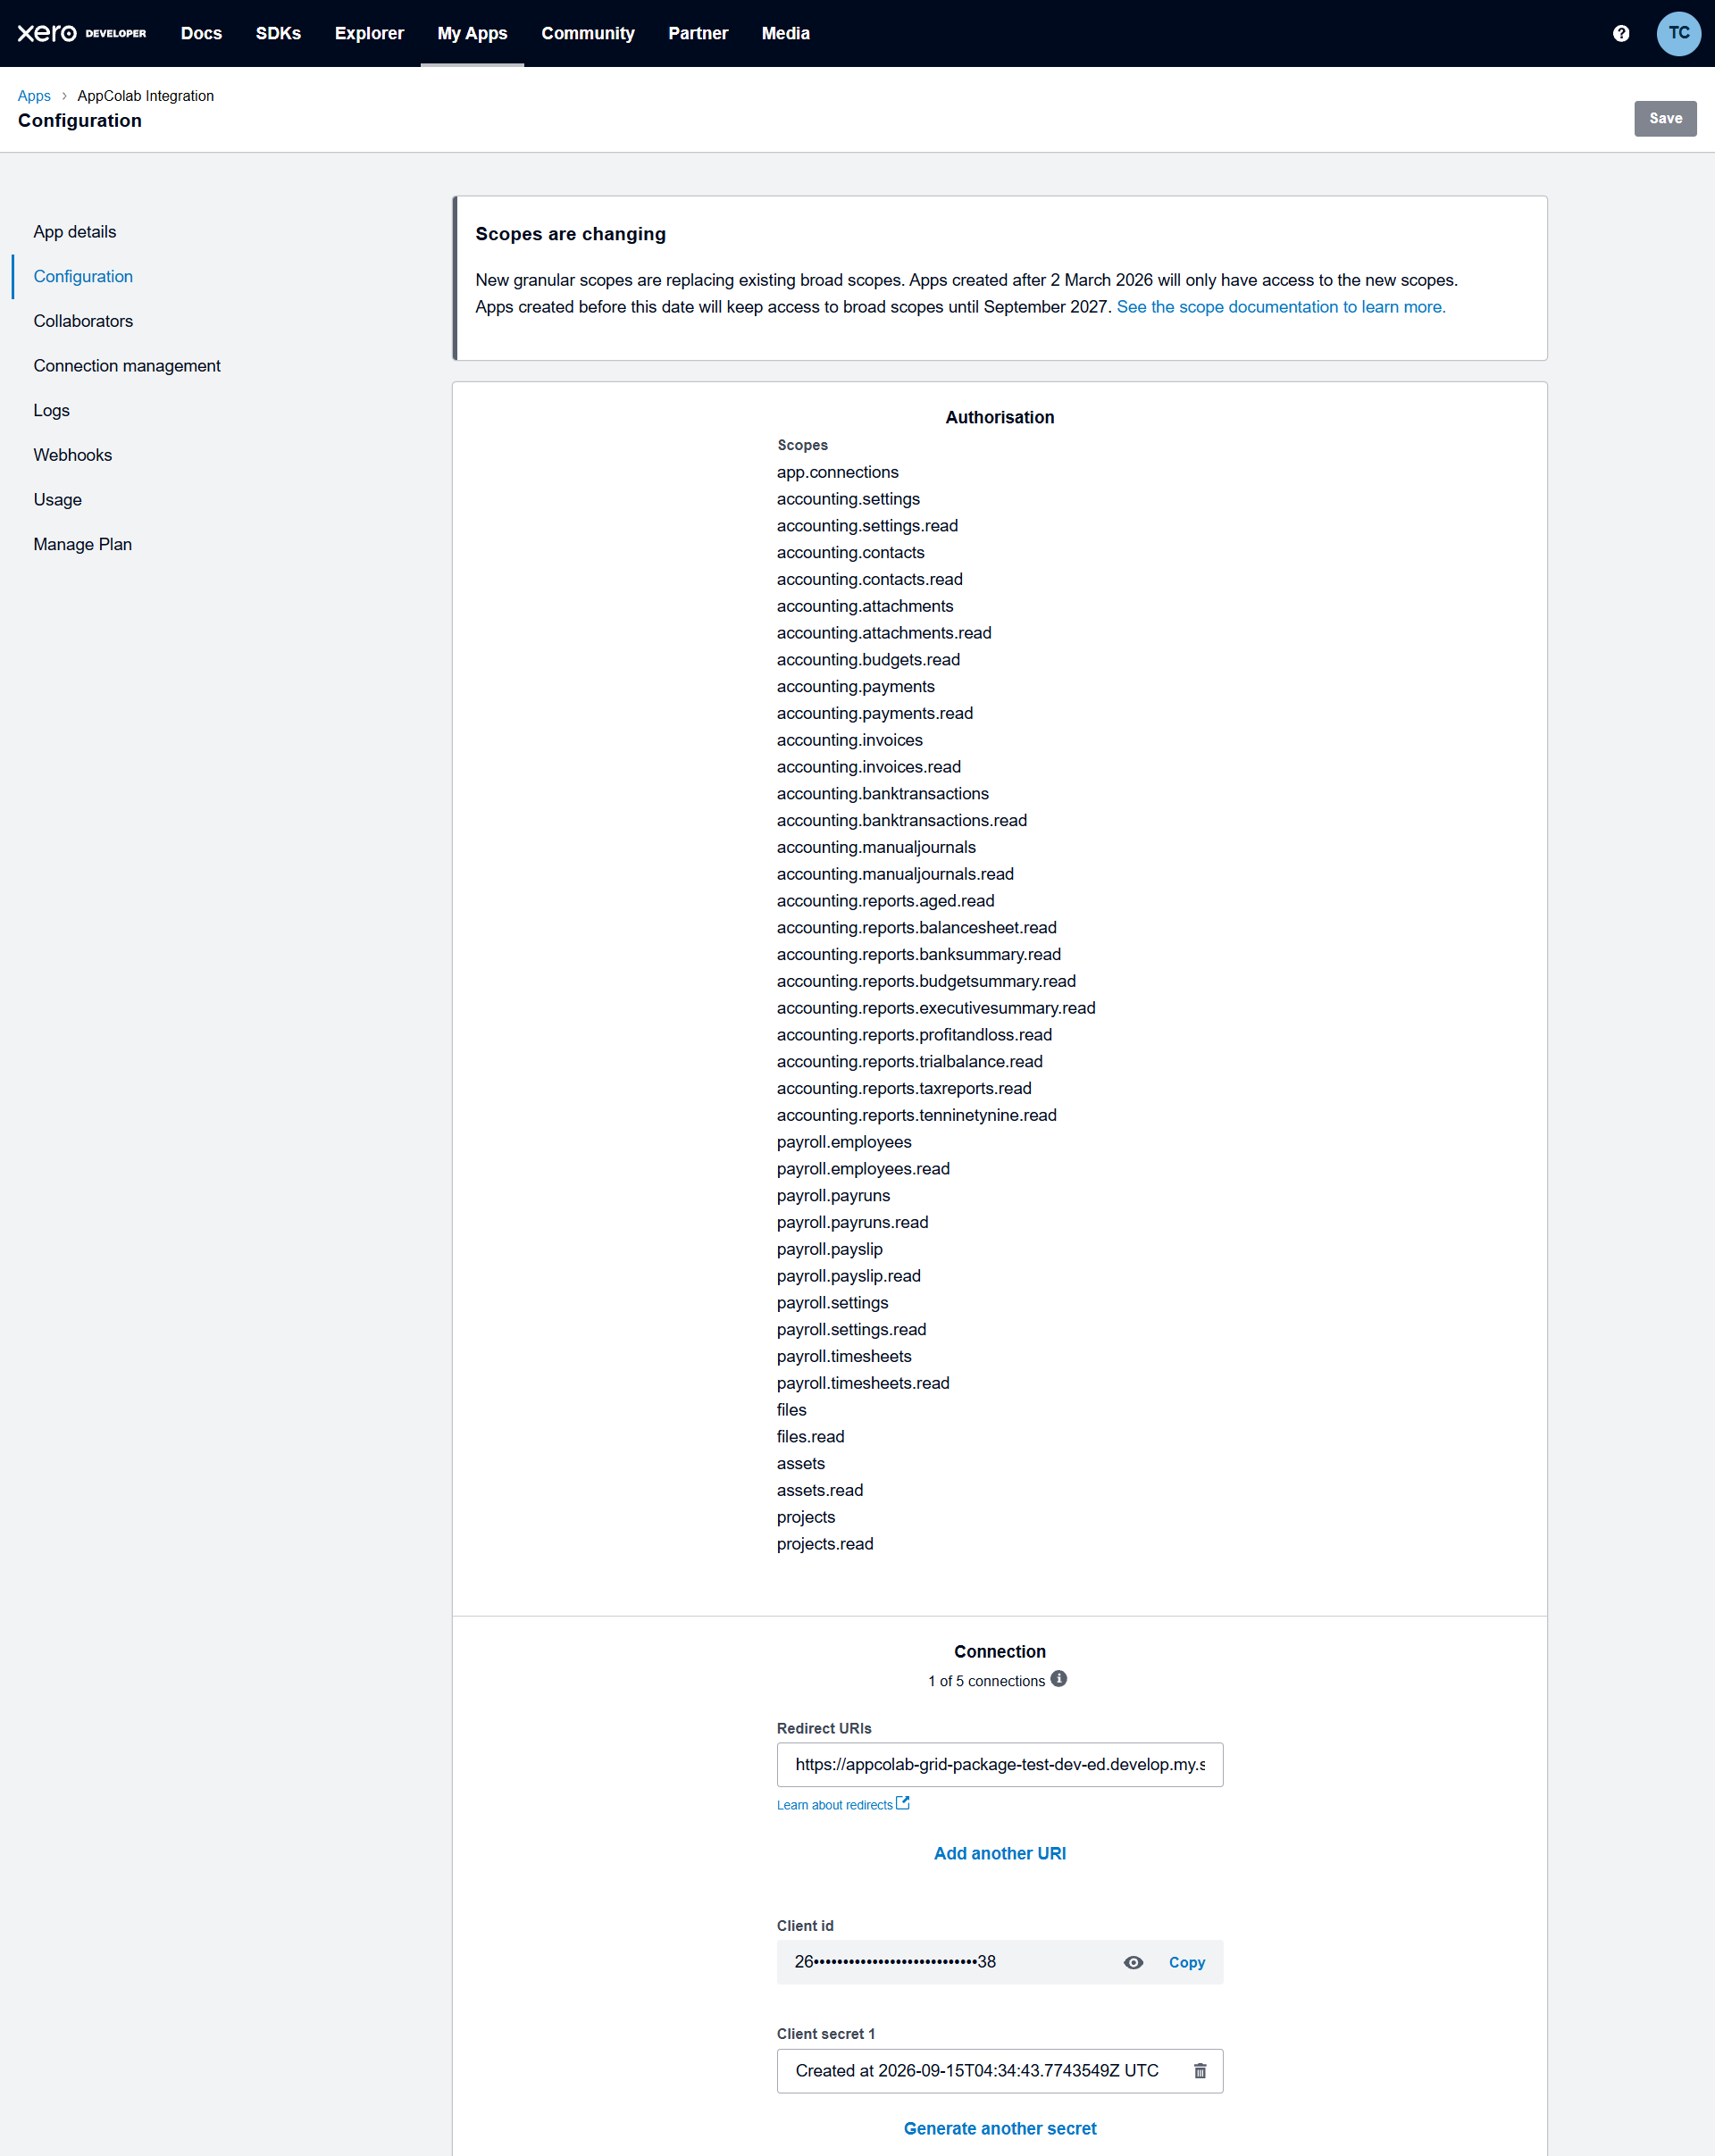
1. Register App in Xero Developer Portal
- Log into the Xero Developer Portal and click New App.
- Set:
- App type:
Web app - App name:
AppColab Grid - Company or application URL:
https://appcolab.com - Redirect URI: Paste your Salesforce OAuth Callback URL from your
Xero_OAuthAuth Provider in Salesforce Setup.
- App type:
- Click Create app and copy your Client ID and Client Secret.
2. Configure Credentials in Salesforce Setup
2.1 Create the Auth. Provider
- In Salesforce Setup, enter Auth. Providers in the Quick Find box and click New:
- Provider Type:
OpenIdConnect - Name:
Xero_OAuth - URL Suffix:
Xero_OAuth - Consumer Key: Paste your Xero Client ID from Step 1.
- Consumer Secret: Paste your Xero Client Secret from Step 1.
- Default Scopes:
openid profile email accounting.transactions accounting.contacts accounting.settings offline_access - Click Save.
- Provider Type:
- Copy the Callback URL displayed at the bottom of the page and paste it into your Xero App’s Redirect URIs in the Xero Developer Portal.
2.2 Create the External Credential
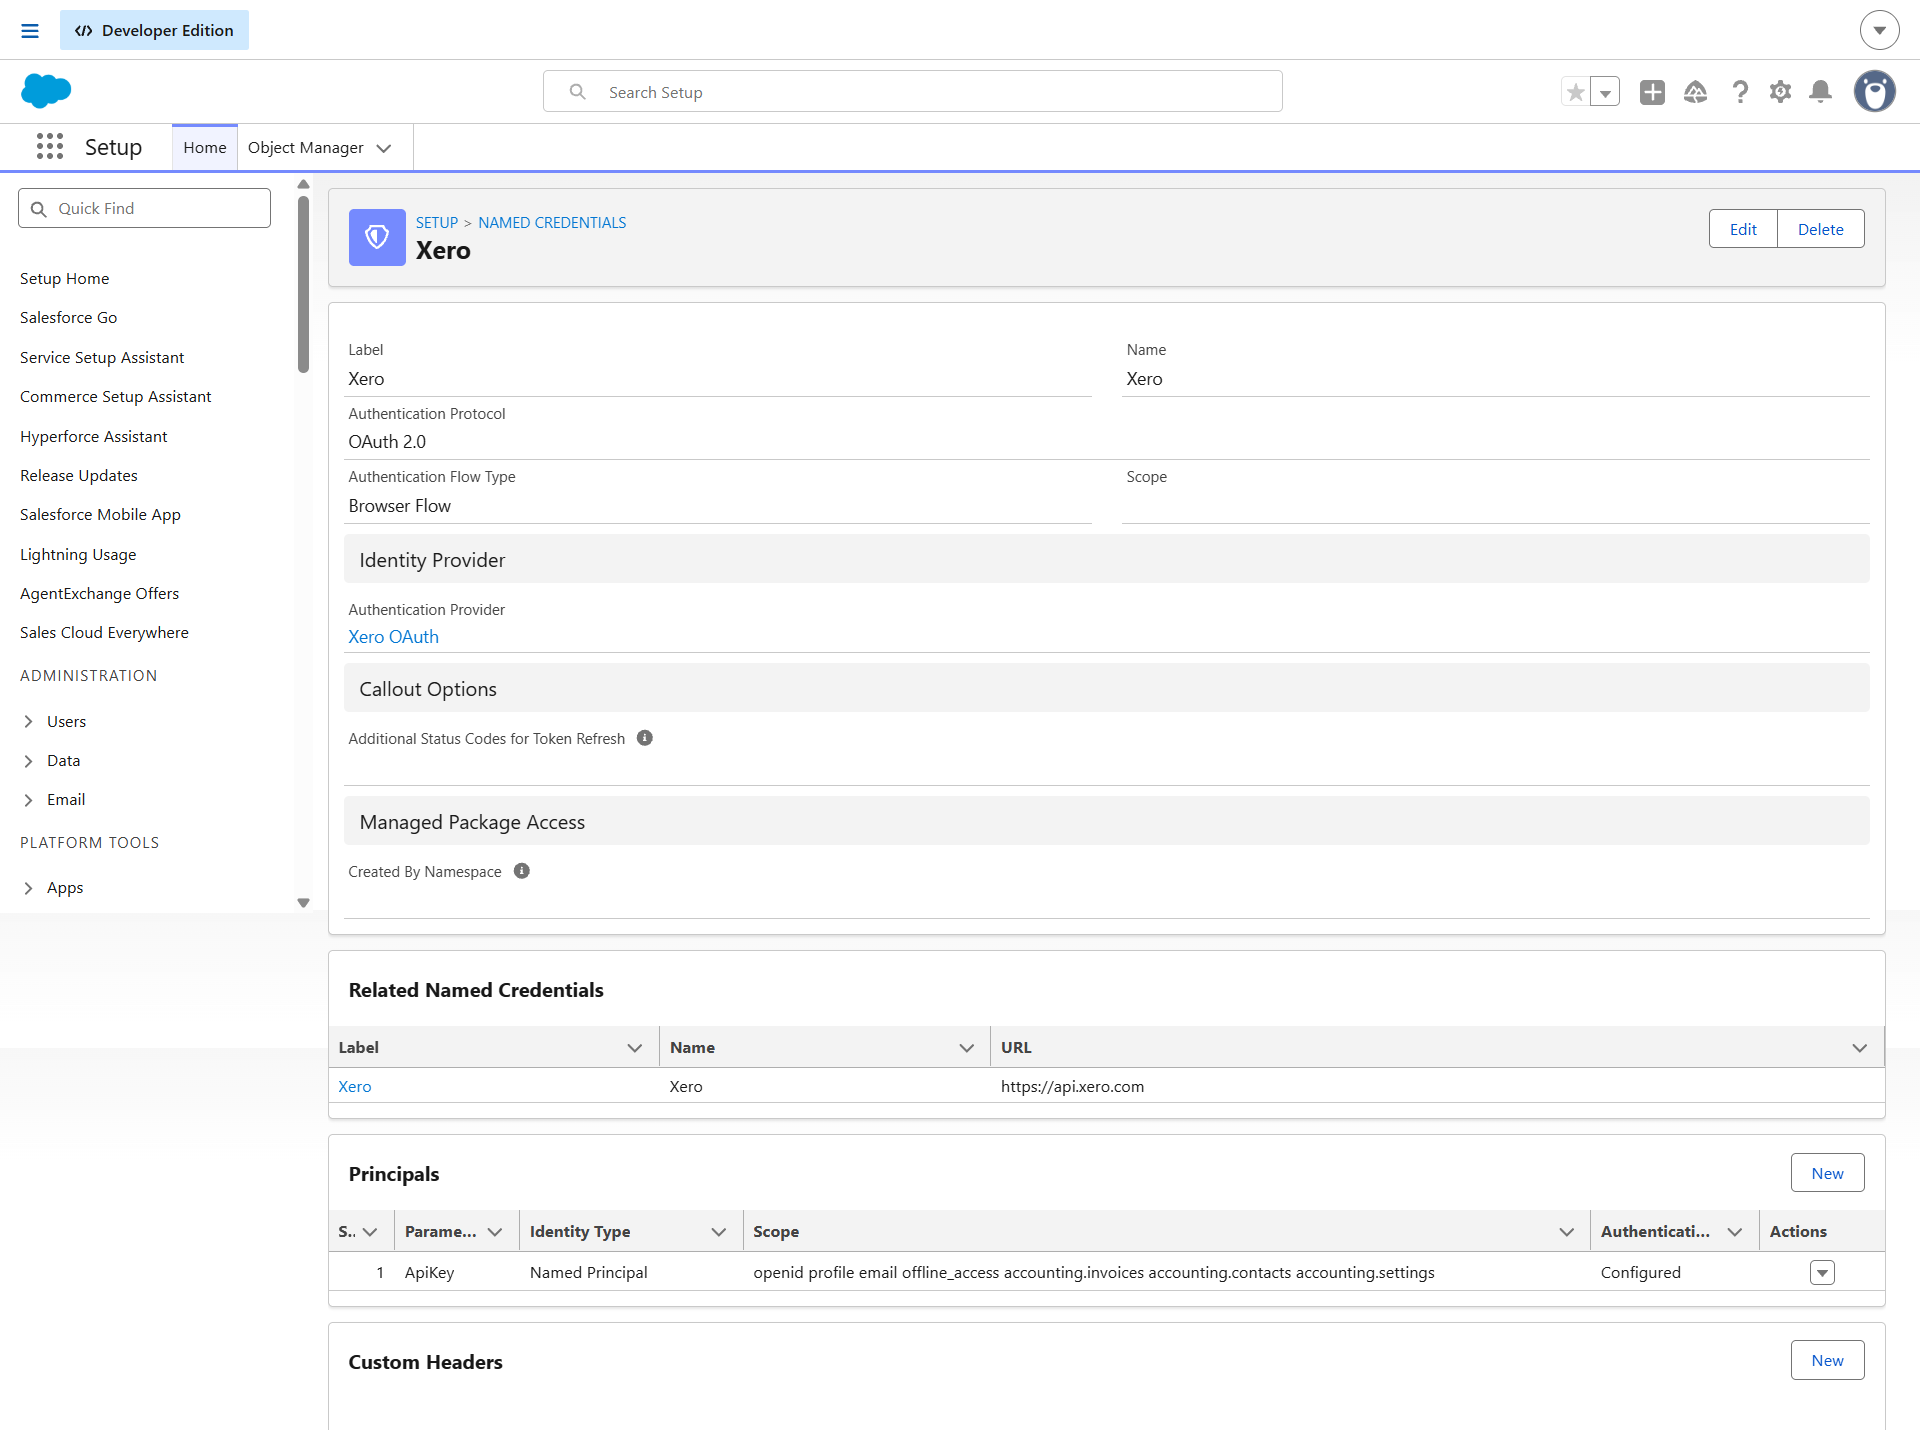
- In Salesforce Setup, enter Named Credentials in Quick Find.
- Click the External Credentials tab → click New:
- Label:
Xero - Name:
Xero - Authentication Protocol:
OAuth 2.0 - Authentication Provider: Select
Xero_OAuth - Scope:
openid profile email offline_access accounting.invoices accounting.contacts accounting.settings - Click Save.
- Label:
- In the Principals section, click New:
- Parameter Name:
ApiKey - Sequence Number:
1 - Identity Type:
Named Principal - Scope:
openid profile email offline_access accounting.invoices accounting.contacts accounting.settings - Click Save.
- Parameter Name:
- On the
ApiKeyrow, click the dropdown arrow▼→ click Authenticate. - Log into Xero, select your Organization, and approve the connection. (Status will update to Configured).
2.3 Create the Named Credential
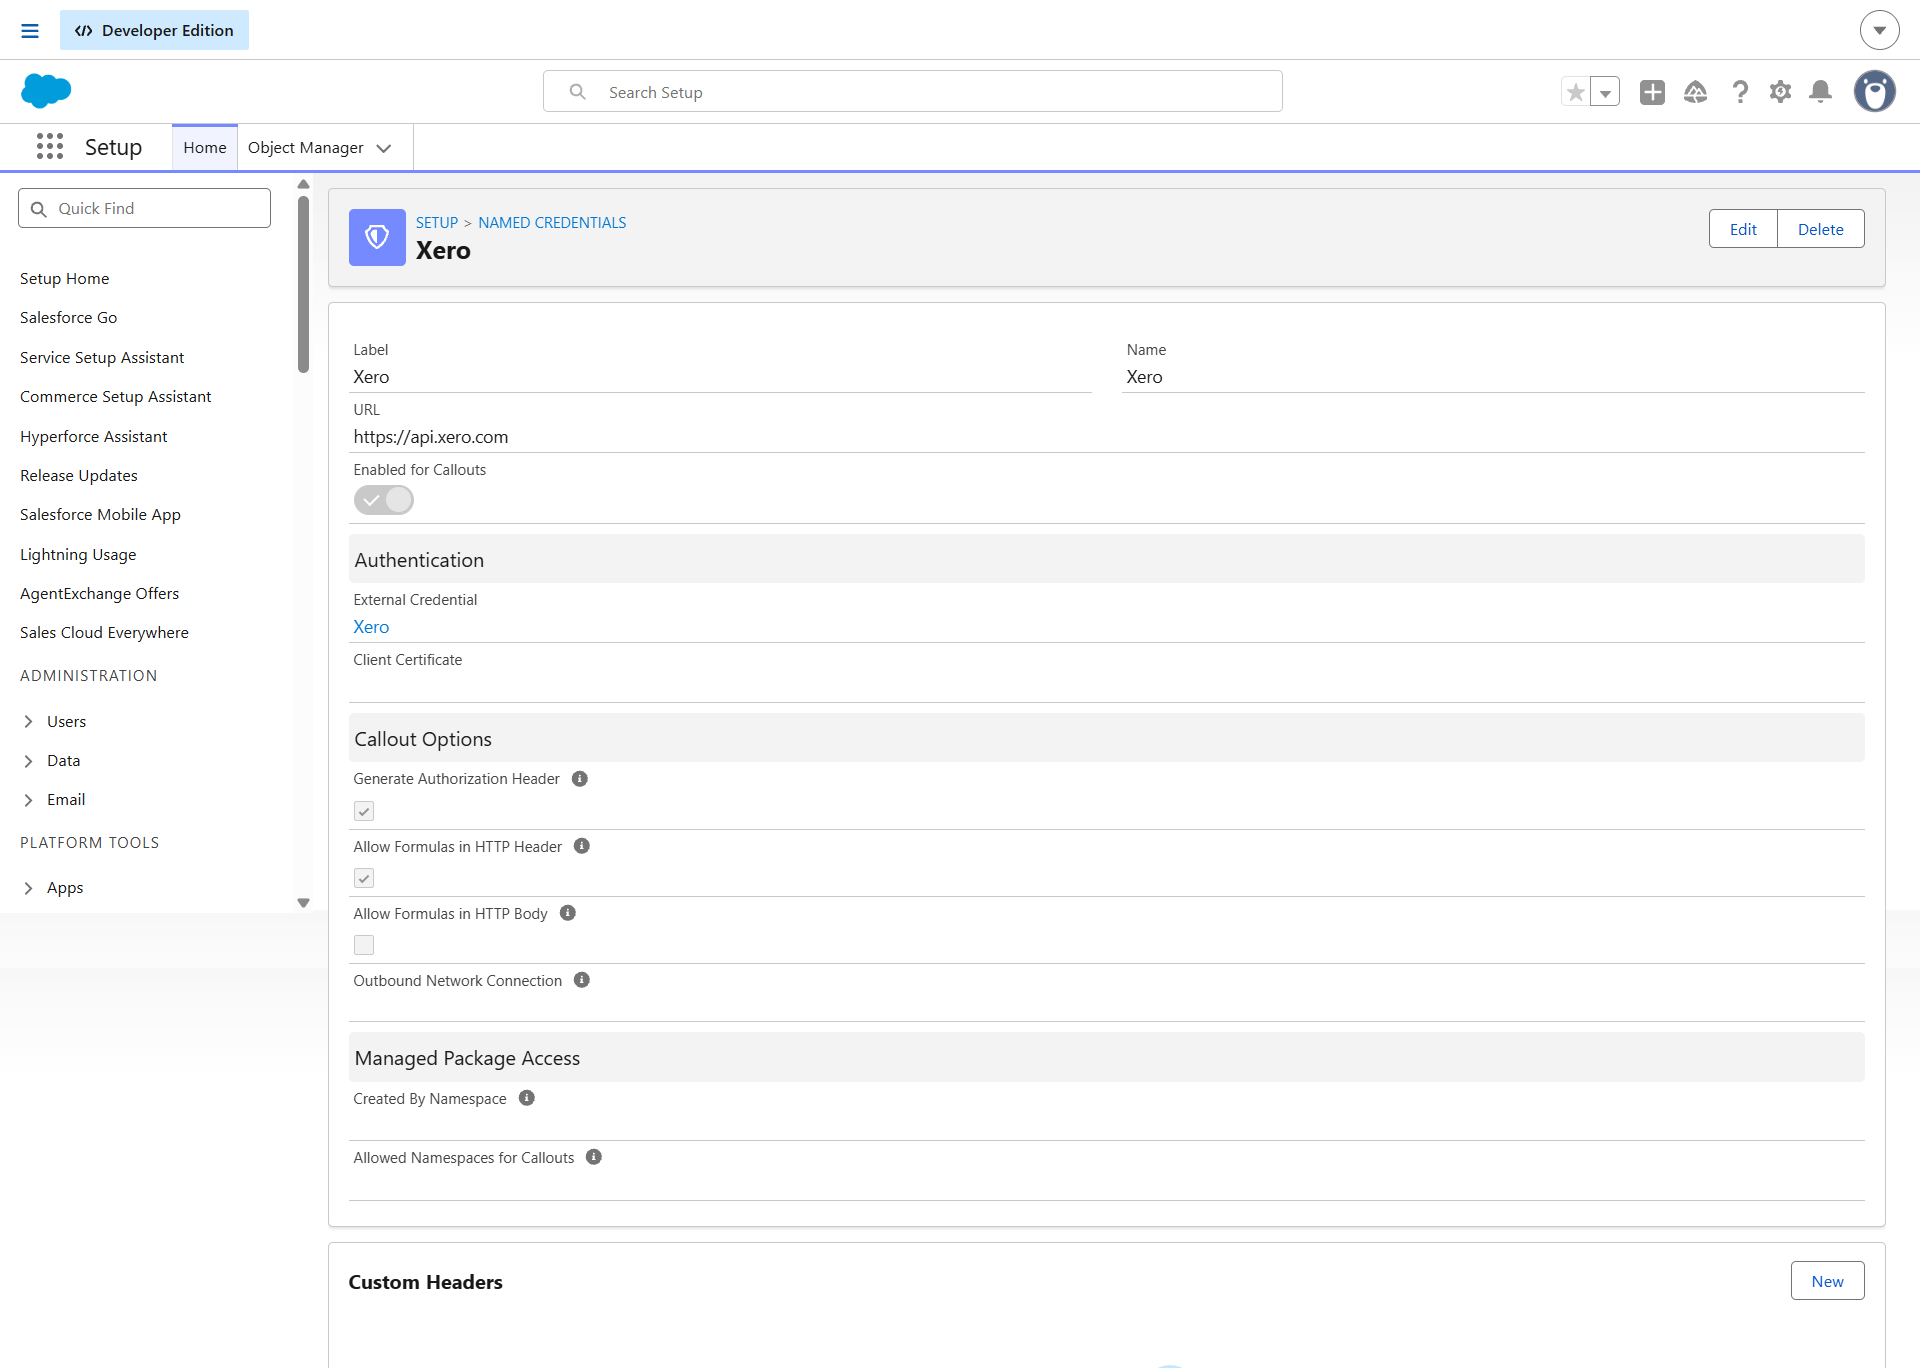
- Click the Named Credentials tab (next to External Credentials) → click New:
- Label:
Xero - Name:
Xero - URL:
https://api.xero.com - External Credential: Select
Xero - Generate Authorization Header: Checked
- Allow Formulas in HTTP Header: Checked
- Label:
- Click Save.
3. Assign Permission Set Access
- In Salesforce Setup, enter Permission Sets in Quick Find.
- Select Integration Admin (or
Appcolab Grid Admin). - Click External Credential Principal Access → click Edit.
- Add
Xero - ApiKeyto Enabled External Credential Principals. - Click Save and verify the permission set is assigned to your Salesforce users.
Creating a Xero Grid Definition
- In Salesforce, open AppColab Grid app → Grid Definitions tab → click New Grid Definition.
- Fill in:
- Grid Settings Name:
Xero_Invoices_Grid - Grid Label:
Xero Invoices - Is Active?: Checked
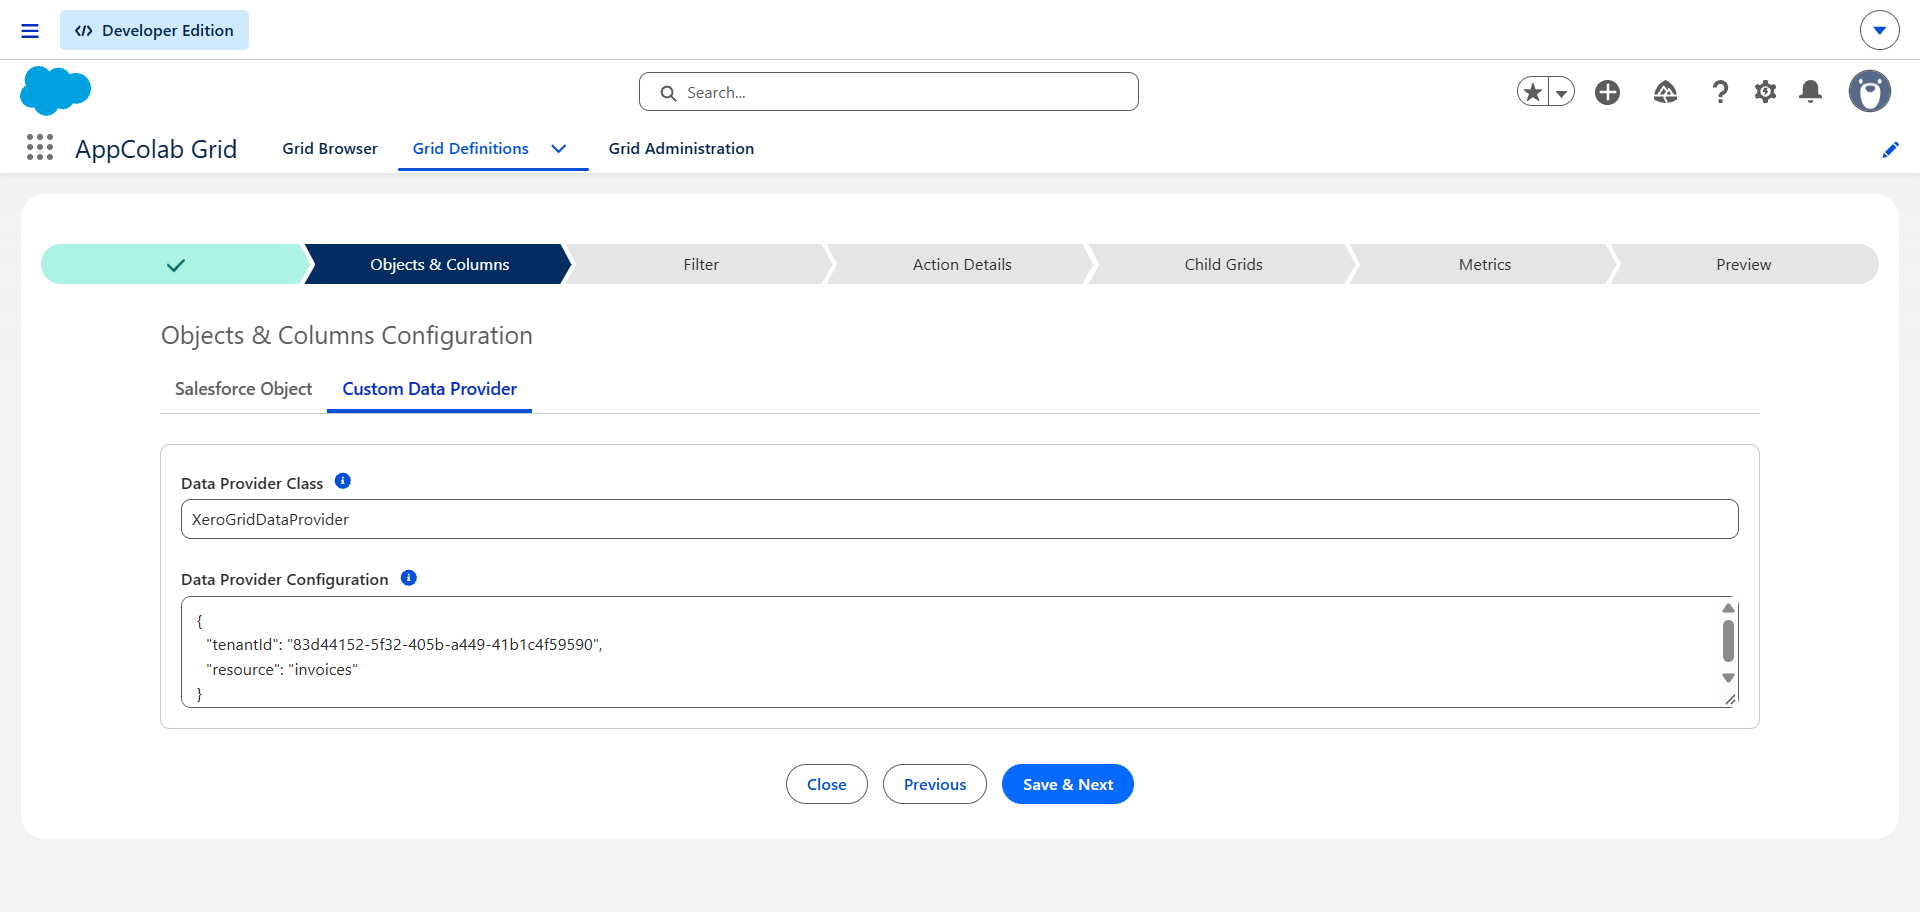
- Data Provider Class:
XeroGridDataProvider - Data Provider Configuration:
{
  "tenantId": "YOUR_XERO_TENANT_ID",
  "resource": "invoices"
}
How to find your Tenant ID:
- In the Xero Developer Portal, open your app (
AppColab Integration). - On the left sidebar menu, click Connection management.
- Find your connected organization in the table and copy the Tenant ID UUID (e.g.
83d44152-5f32-405b-a449-41b1c4f59590).
Tip: Set
"resource"to"contacts","accounts","bills", or"payments"to display other financial records. - In the Xero Developer Portal, open your app (
- Grid Settings Name:
- Click Save & Next → proceed to Preview.
- Real-time invoices render with Invoice Number, Contact Name, Date, Due Date, Total, Amount Due, Status, and Currency!
Supported Grid Features
| Resource | Supported Columns |
|---|---|
| Invoices | Invoice Number, Reference, Contact Name, Date, Due Date, Total, Amount Due, Amount Paid, Status, Currency |
| Contacts | Name, First Name, Last Name, Email, Phone, Contact Status, Is Customer?, Is Supplier? |
| Accounts | Code, Account Name, Type, Class, Tax Type, Description, Status, Payments Enabled |
| Payments | Date, Invoice Number, Account, Account Code, Amount, Reference, Status |
Troubleshooting
401 Unauthorized / Token Expired: Re-authenticate theXero_Userprincipal in Salesforce Setup → Named Credentials → External Credentials →Xero.400 Bad Request / Tenant ID missing or invalid: Make sure your"tenantId"in the Data Provider Configuration JSON is the UUID of your active connected Xero organization.