
Shopify Grid Integration
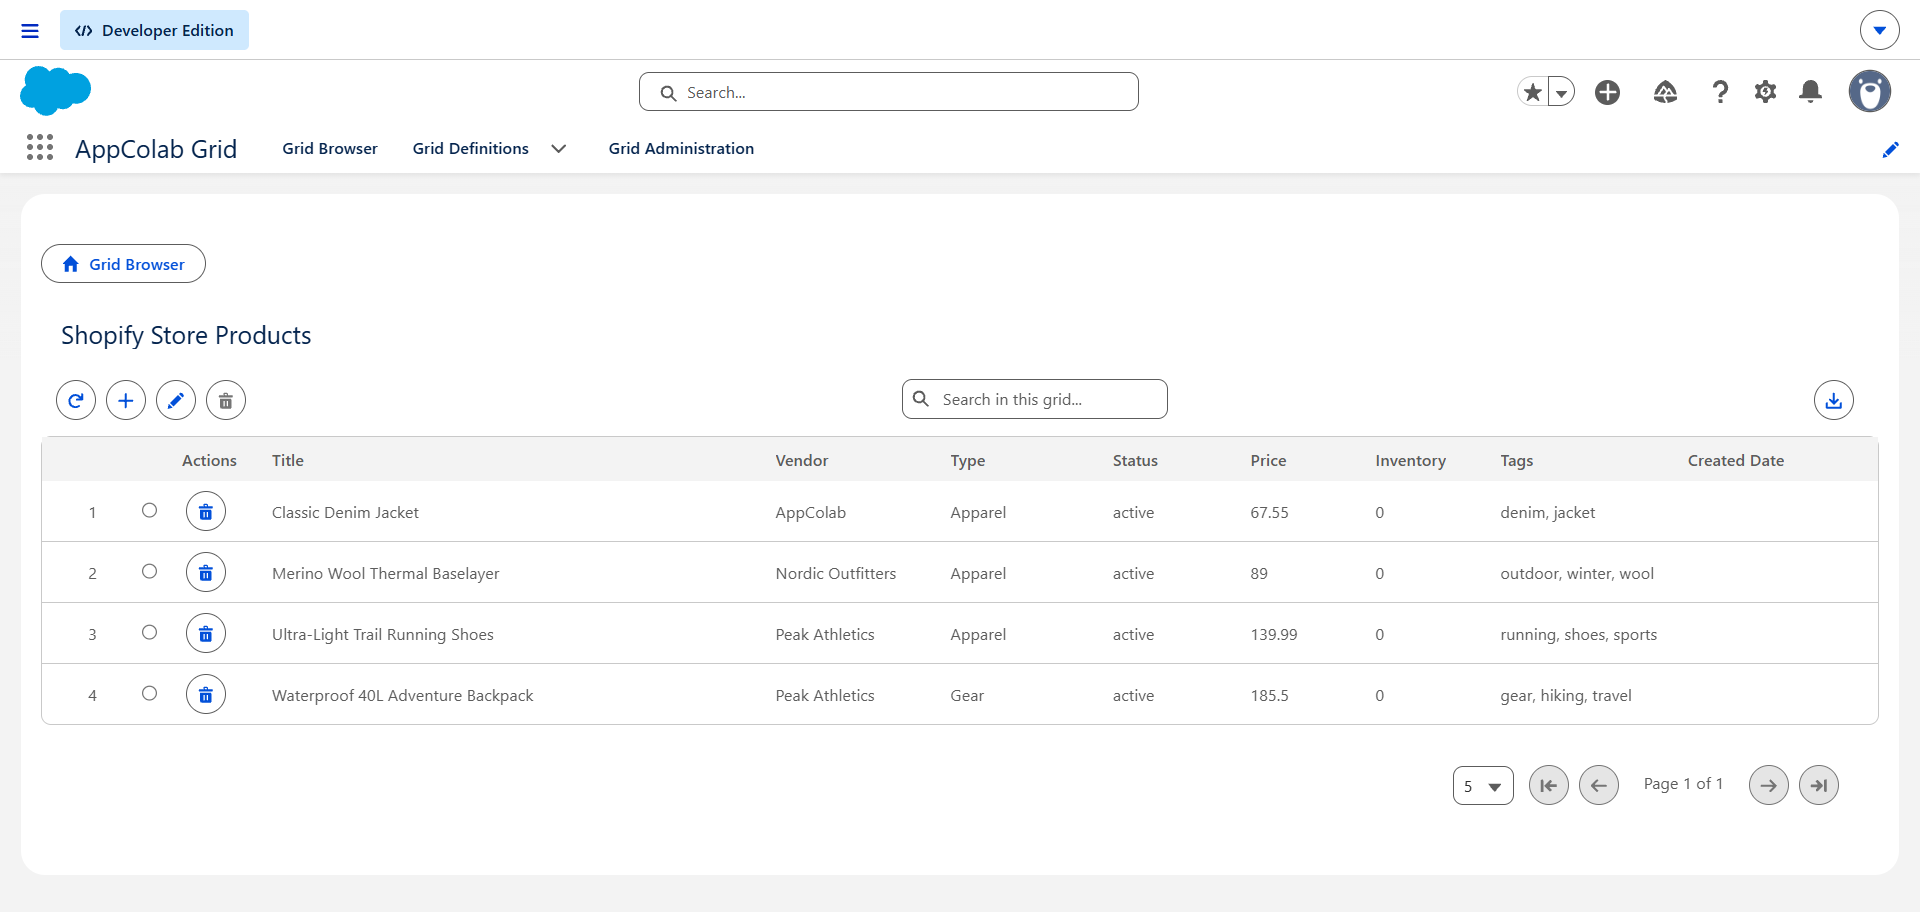
The Shopify Grid integration allows e-commerce and sales teams to view, search, add, inline-edit, delete, and download records from Shopify (Products, Orders, and Customers) directly inside AppColab Grid.
What’s Deployed
| Component | Name | Purpose |
|---|---|---|
| Named Credential | Shopify |
Connects to your store’s https://YOUR_STORE.myshopify.com endpoint |
| External Credential | Shopify |
Custom authentication with X-Shopify-Access-Token: <token> |
| Apex Client | ShopifyClient.cls |
REST client supporting listResources, getResource, createResource, updateResource, deleteResource |
| Apex Data Provider | ShopifyGridDataProvider.cls |
Implements appcg.GridDataProviderV1 and appcg.GridDataMutationProviderV1 with full CRUD for Products/Customers and Read for Orders |
| Permission Set | Integration_Admin |
Grants access to Shopify → ApiKey external credential principal |
One-Time Manual Setup
1. Generate Your Shopify Admin API Access Token
[!NOTE] Shopify supports two app creation methods depending on your store type:
Option A: Modern Developer Dashboard (dev.shopify.com — Recommended for Partner/Dev Stores)
- Open your app in dev.shopify.com (or click Create app).
- Under Versions, create or edit a version:
- App URL:
https://localhost - Embed app in Shopify admin: Unchecked
- API access scopes: Select
read_products,write_products,read_orders,read_customers,write_customers. - Click Release.
- App URL:
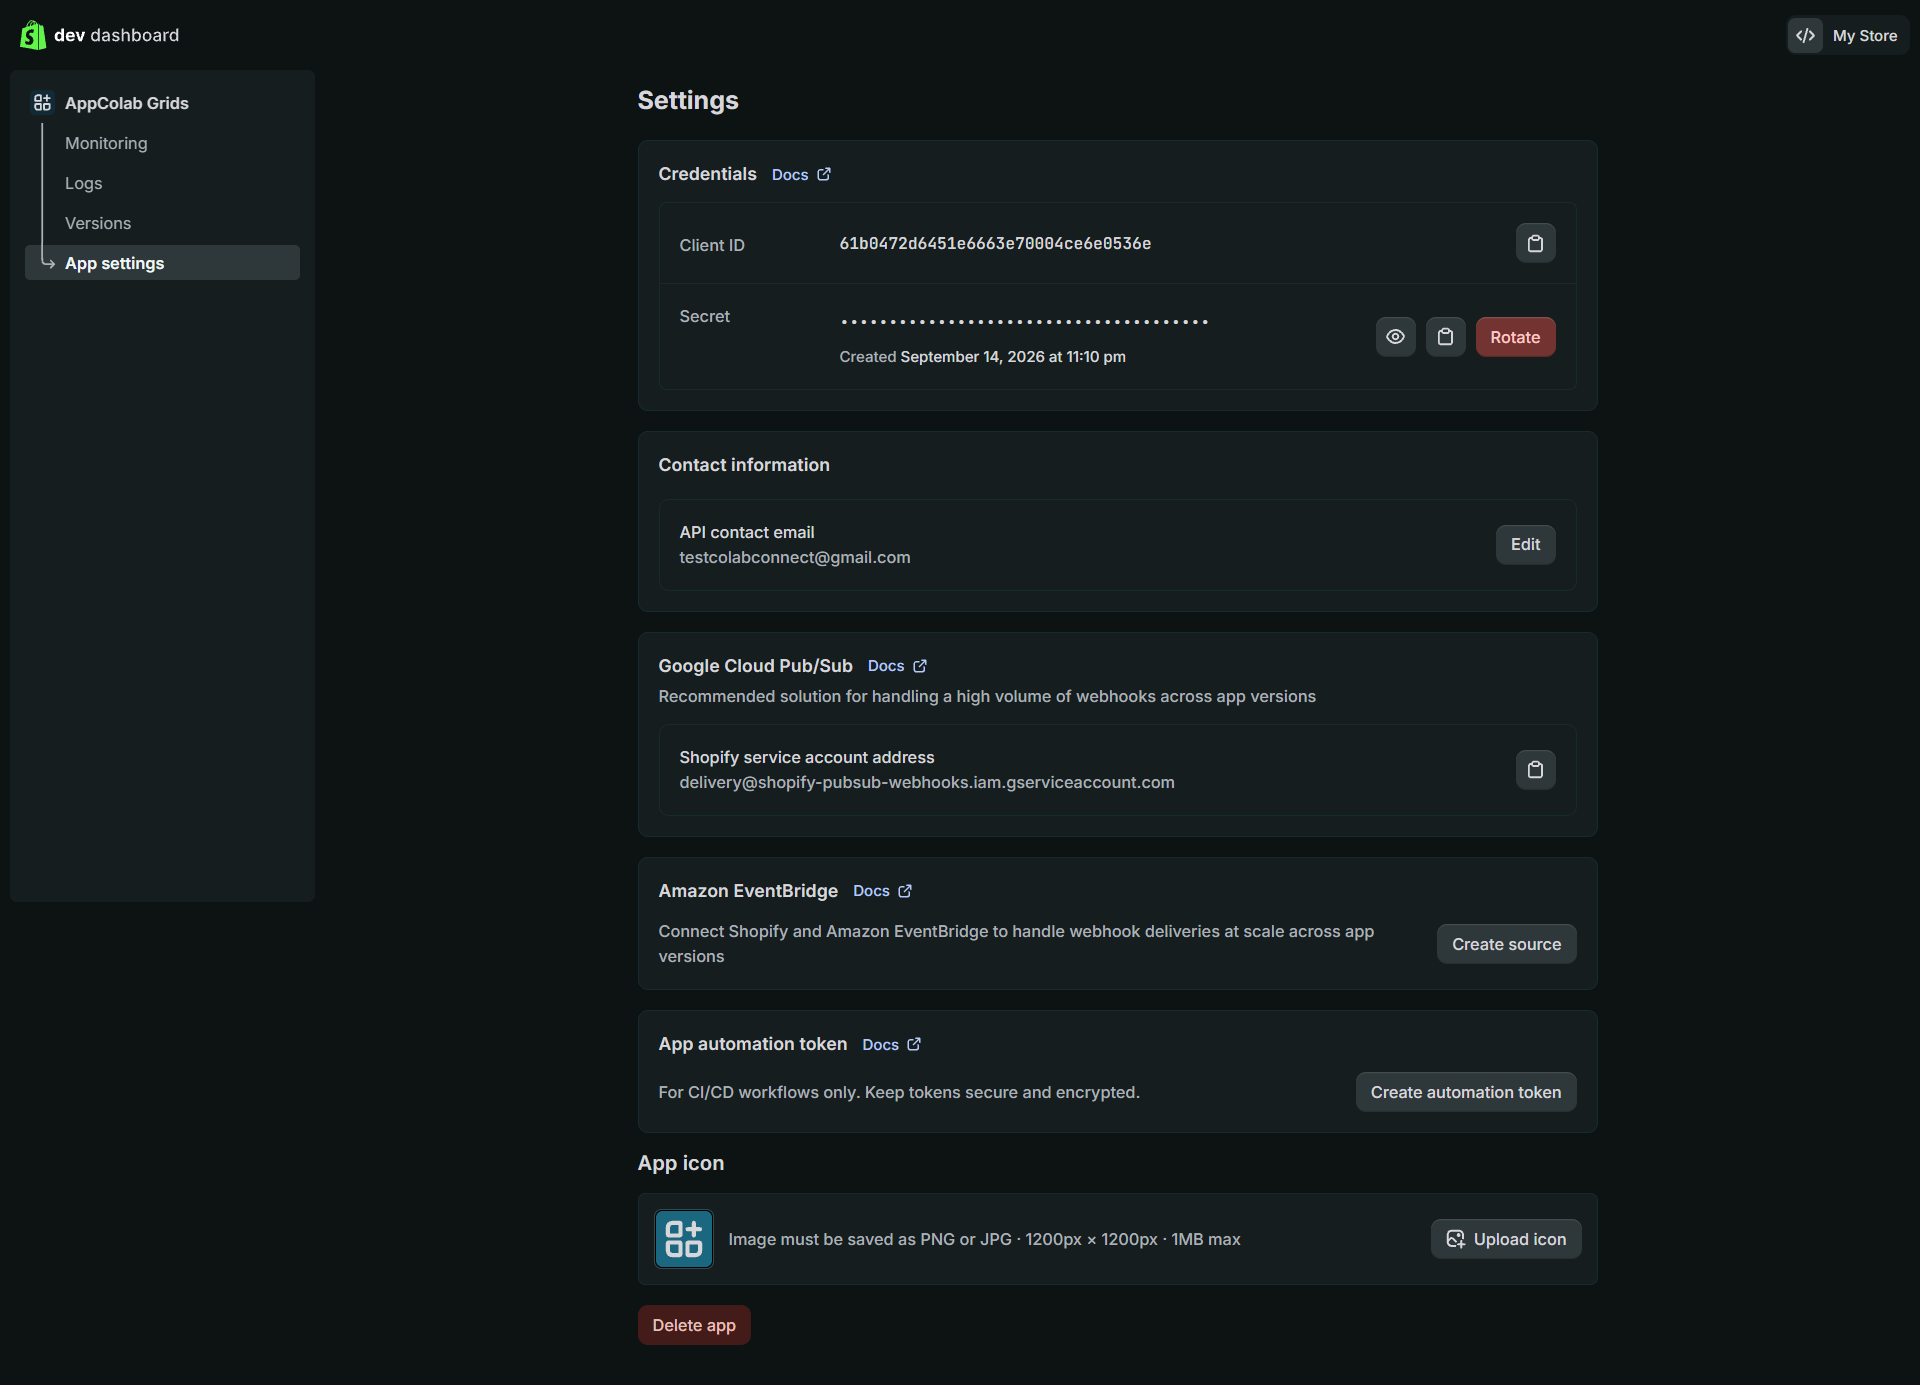
- Under App settings, copy your Client ID and Client Secret.
- Open the authorization link in your browser:
https://admin.shopify.com/store/YOUR_STORE_NAME/oauth/authorize?client_id=YOUR_CLIENT_ID&scope=read_products,write_products,read_orders,read_customers,write_customers&redirect_uri=https://localhost - Click Install app. The browser will redirect to
https://localhost/?code=YOUR_CODE&.... Copy thecodefrom the browser address bar. - Exchange the code for your permanent offline token (
shpat_...):- PowerShell:
curl -X POST "https://YOUR_STORE_NAME.myshopify.com/admin/oauth/access_token" -H "Content-Type: application/json" -d '{\"client_id\":\"YOUR_CLIENT_ID\",\"client_secret\":\"YOUR_CLIENT_SECRET\",\"code\":\"YOUR_CODE\"}' - Postman / cURL: Send a
POSTrequest tohttps://YOUR_STORE_NAME.myshopify.com/admin/oauth/access_tokenwith JSON body:{ "client_id": "YOUR_CLIENT_ID", "client_secret": "YOUR_CLIENT_SECRET", "code": "YOUR_CODE" }
- PowerShell:
- Copy the
access_token(shpat_...) from the response.
Option B: Store Admin Custom App (admin.shopify.com — Production Stores)
- In your Shopify Store Admin, navigate to:
https://admin.shopify.com/store/YOUR_STORE_NAME/settings/apps/development
(or go to Settings ⚙️ → Apps and sales channels → Develop apps). - Click Create an app (e.g.
AppColab Grid). - Under the Configuration tab, click Configure next to Admin API integration:
- Enable scopes:
read_products,write_products,read_orders,read_customers,write_customers. - Click Save.
- Enable scopes:
- Go to the API credentials tab → click Install app → confirm Install.
- Under Admin API access token, click Reveal token once and copy the token (
shpat_...).
2. Configure Credentials in Salesforce Setup
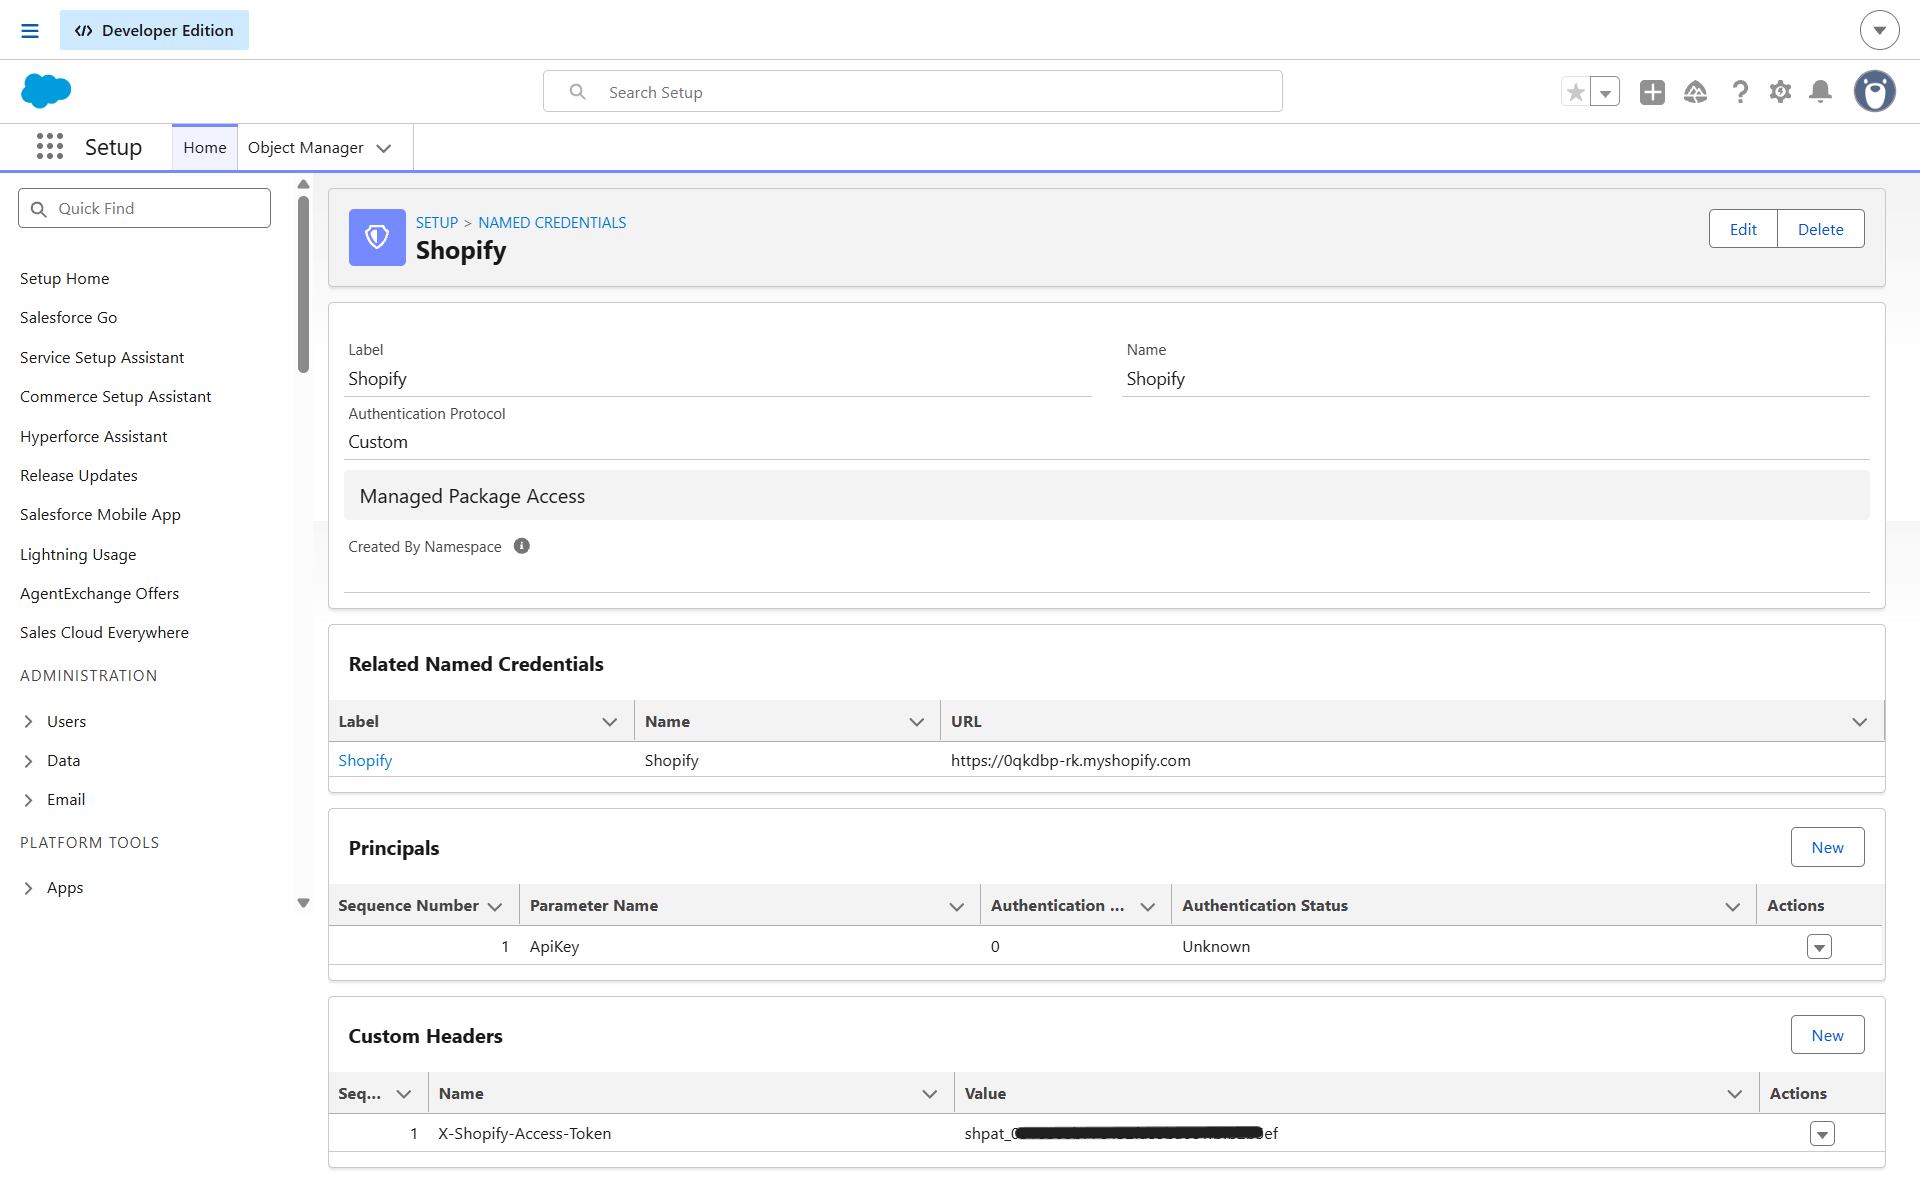
2.1 Create the External Credential
- Go to Setup (gear icon ⚙️ → Setup).
- In the Quick Find box, enter Named Credentials and select Named Credentials.
- Click the External Credentials tab → click New:
- Label:
Shopify - Name:
Shopify - Authentication Protocol:
Custom - Click Save.
- Label:
- In the Principals section, click New:
- Parameter Name:
ApiKey - Sequence:
1 - Click Save.
- Parameter Name:
- In the Custom Headers section, click New:
- Name:
X-Shopify-Access-Token - Value:
shpat_YOUR_TOKEN(paste the token copied from Step 1) - Sequence Number:
1 - Click Save.
- Name:
2.2 Create the Named Credential
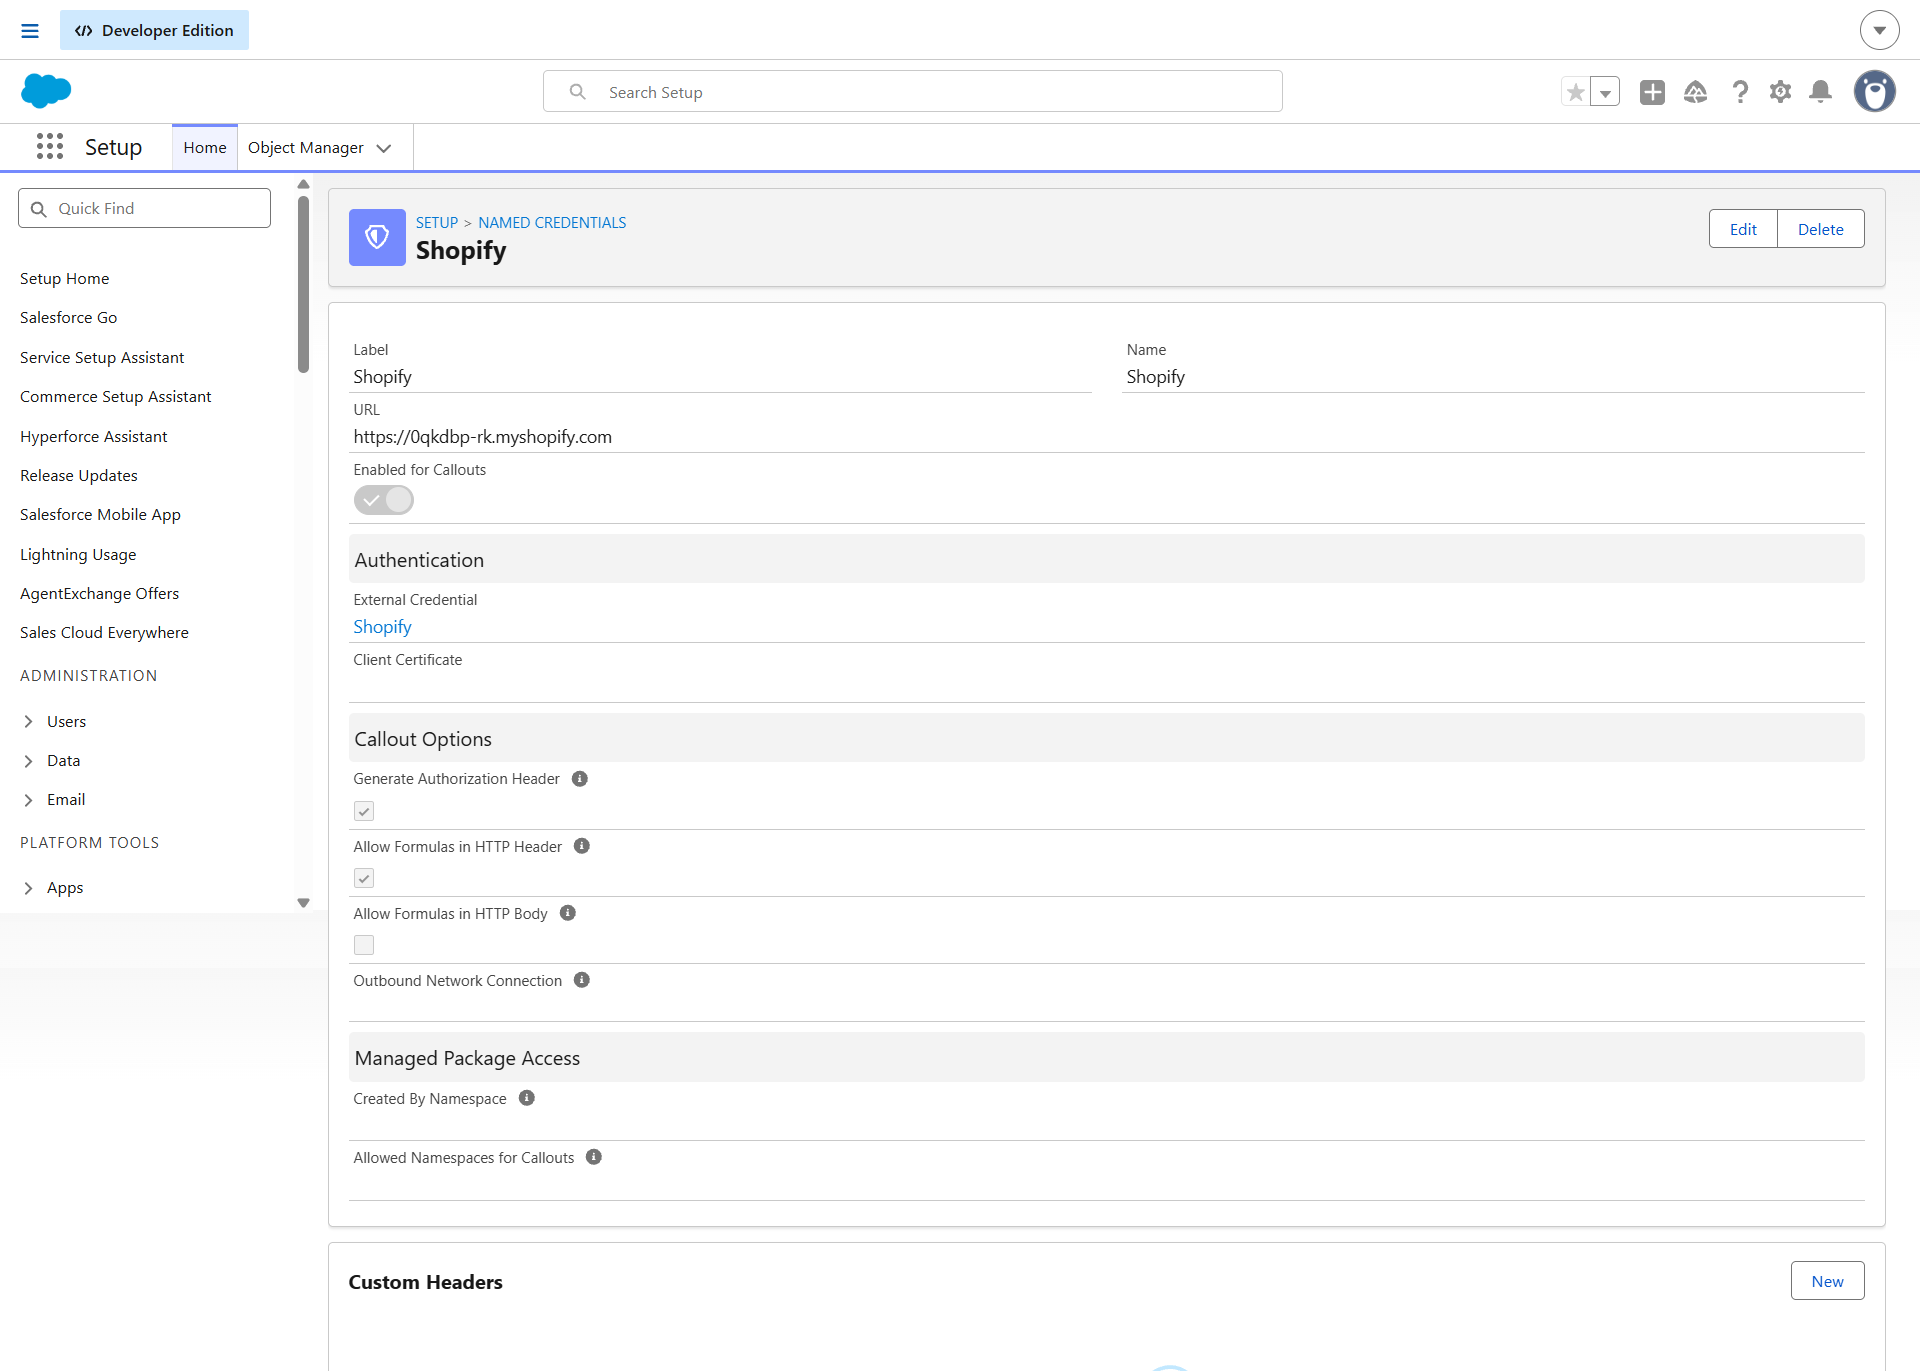
- Click the Named Credentials tab (next to External Credentials) → click New:
- Label:
Shopify - Name:
Shopify - URL: Enter your store’s URL (e.g.
https://your-store.myshopify.com) - External Credential: Select
Shopify - Generate Authorization Header: Leave Unchecked
- Allow Formulas in HTTP Header: Checked
- Label:
- Click Save.
3. Assign Permission Set Access
- In Salesforce Setup, enter Permission Sets in Quick Find.
- Select Integration Admin (or
Appcolab Grid Admin). - Click External Credential Principal Access → click Edit.
- Add
Shopify - ApiKeyto Enabled External Credential Principals. - Click Save and verify the permission set is assigned to your Salesforce users.
Creating a Shopify Grid Definition
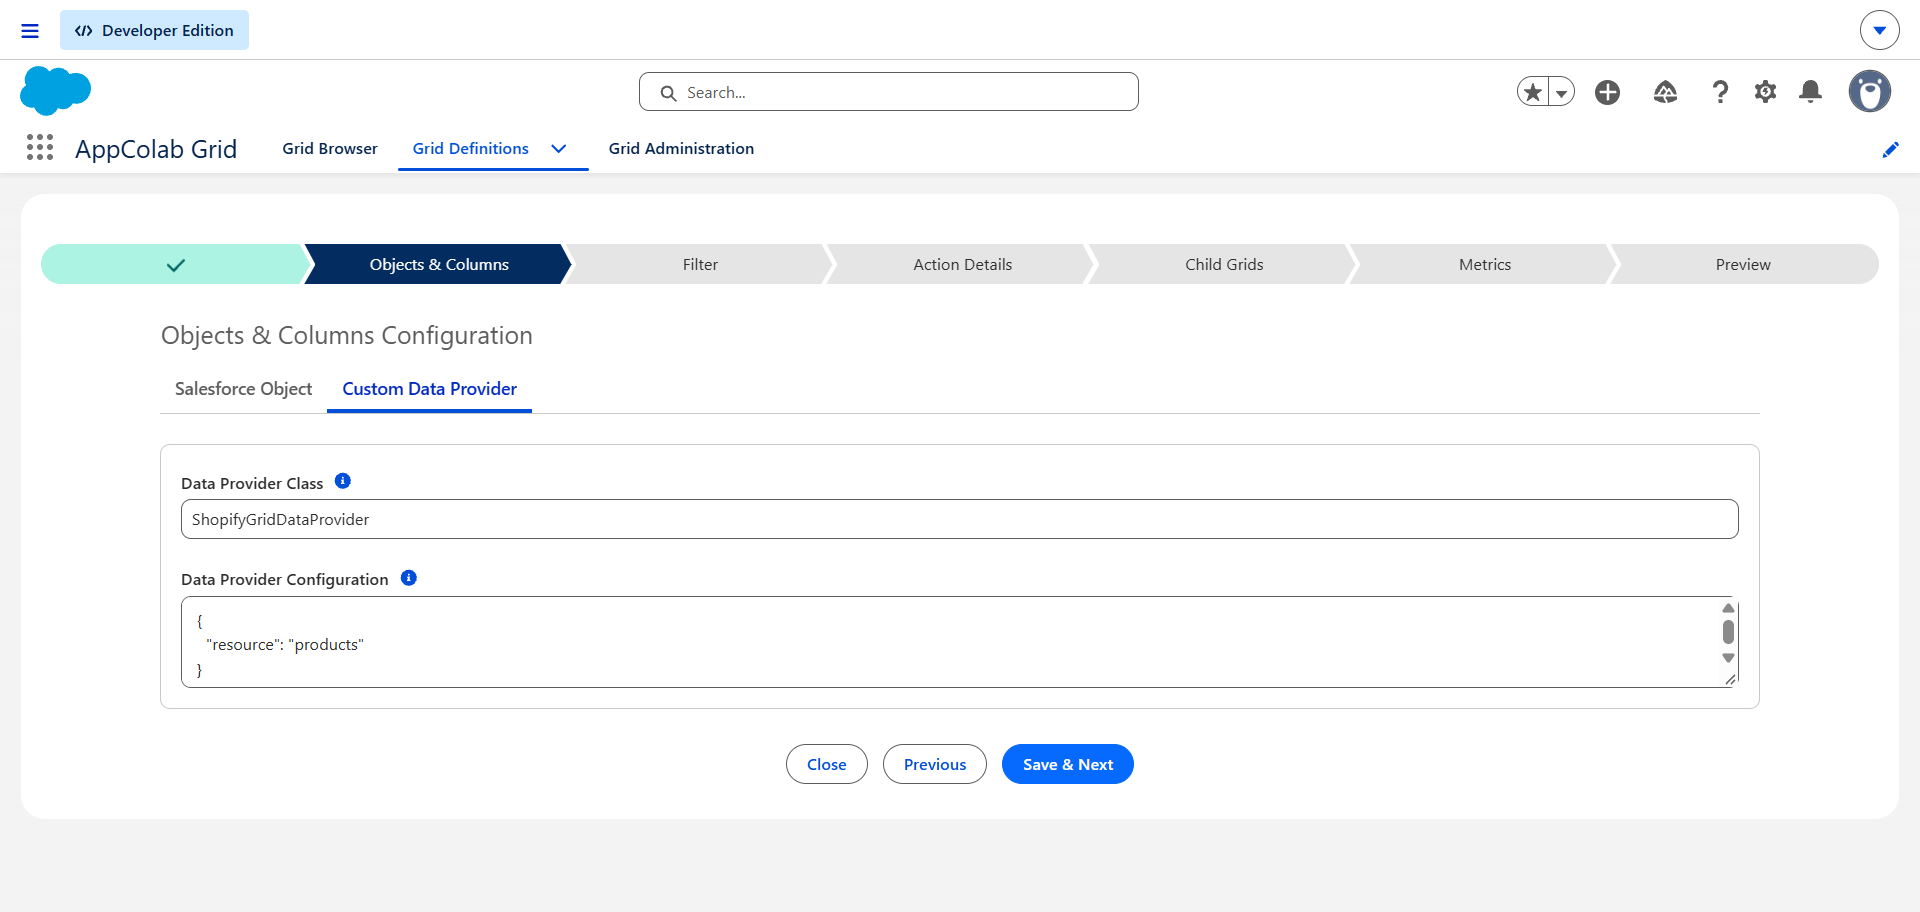
- In Salesforce, open AppColab Grid app → Grid Definitions tab → click New Grid Definition.
- Fill in:
- Grid Settings Name:
Shopify_Products_Grid - Grid Label:
Shopify Products - Is Active?: Checked
- Data Provider Class:
ShopifyGridDataProvider - Data Provider Configuration:
{ "resource": "products" }Tip: Change
"resource"to"customers"or"orders"to create dedicated grids for those entities.
- Grid Settings Name:
- Click Save & Next → proceed to Preview.
- All Shopify products load live with Title, Vendor, Product Type, Status, and Creation Date!
Supported Grid Features
| Resource | Supported Actions | Columns |
|---|---|---|
| Products | View, Search, Inline Edit, Add Product, Delete | Title, Product Type, Vendor, Status, Tags, Created At |
| Orders | View, Search, Filter, Export | Order Name, Customer, Email, Total Price, Financial Status, Fulfillment Status, Date |
| Customers | View, Search, Inline Edit, Add Customer, Delete | First Name, Last Name, Email, Phone, Orders Count, Total Spent, State |
Troubleshooting
401 Unauthorized / [API] Invalid API key or access token: Verify that the header name is exactlyX-Shopify-Access-Tokenand the token begins withshpat_.403 Forbidden / [API] This action requires merchant approval: Check that your Shopify private app has the requested Admin API scopes (read_products,read_orders, etc.).